ONE --------------------------------------------
Before I begin, I would like to thank my friend Jane Krejci, who taught me how to can tomatoes. Once a year I do this now, when the dry-farmed tomatoes are in season, and then I always have tomatoes that I "know where they came from" for cooking with!
I would also like to thank my husband, Ken, who took a lot of the photos! [The ones where I or my hands are in them, of course ;-)]
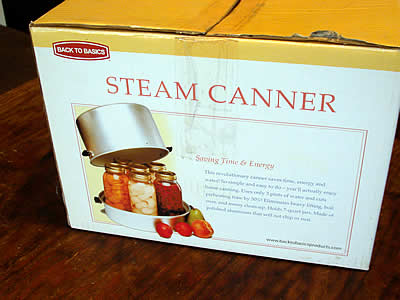
I use a steam canner instead of a water bath canner. They're about a third to a half the cost of a water bath canner, and save a lot of water and energy. The principle is the same: heating the contents of the jars to kill unwanted bacteria (bacteria is not all bad; often it is beneficial - think fermentation - but in the case of canning, it is not wanted) and create a seal so that the jars can be stored safely without need of refrigeration. The only difference is, a steam canner bathes the jars in steam instead of immersing them in water. So it uses a LOT less water, which translates into less energy to heat the water, and less time to heat it up... all sorts of plusses. (Again, thanks go to Jane for this - she's been using one for years and years, and so it is how I learned.)
Each year I put up tomatoes two ways: cold-packed "whole" (well, in large chunks, anyway), and puree. There's a logic to this; dry-farmed tomatoes can run small, and peeling each individually for canning whole is very time-consuming. So I sort the tomatoes and only can the larger ones whole, and save the smaller ones for puree, using a food mill to remove skins and seeds for me. I'll talk about both, below.
For whole, cold-packed tomatoes, figure about 2 lbs. of tomatoes per quart (data point courtesy of Happy Girl Kitchen Co. - thanks Jordan!). For the tomato puree (which I put up in pint, not quart jars), the figure is less critical; it all depends on how far down you reduce the sauce before canning. Sometimes I'll do puree when I want to use up LOTS of tomatoes!
One last thing before I begin: I hope it goes without saying that you want to work in a clean workspace, with clean tools, jars, hands, etc. I don't want to lecture people on this - it is just common sense.
TWO ---------------------------------------------
I'm going to talk about the cold-pack process first, and then finish with the puree (because that's the order I did things in!)
Let's start with how to peel tomatoes. Remember: you don't need to peel them if you're just making puree (see starting at TWENTY-SIX, below).
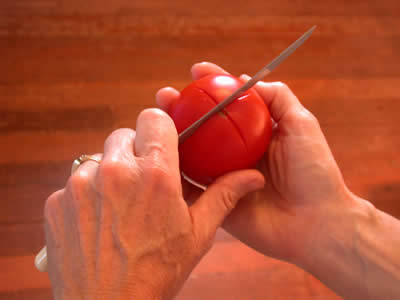
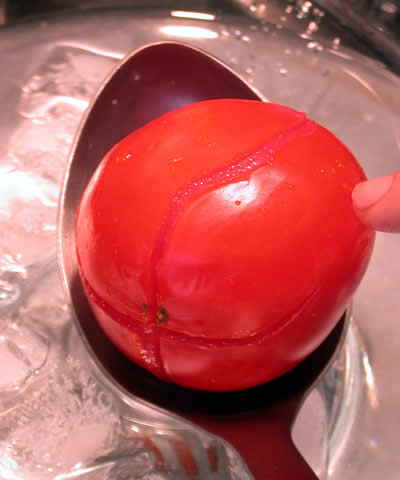
First, you score them by cutting an "X" in the skin on the bottom of each tomato. This facilitates the skin separating from the flesh in the next step (you'll see).
THREE ------------------------------------------
Peeling tomatoes, continued...
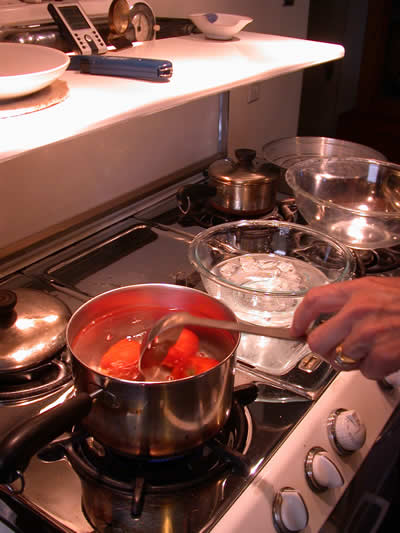
You'll need a pot of boiling water, a bowl of ice water, another bowl for peeling into, and a plate or something for holding your peeled tomatoes until you're ready to pack them into the jars.
Drop the scored tomatoes into the boiling water, then time them/watch them: you just want them in there long enough for the skin to split (see next picture). This will take somewhere between 15 and 45 seconds.
Be aware that the longer they are in the boiling water, the deeper the flesh gets 'cooked' which causes you to lose more flesh when peeling.
That's why the bowl of ice water: as soon as the skin splits, quickly transfer them to the ice water to halt the cooking. (It also conveniently makes them cool enough to handle!)
FOUR ------------------------------------------
See what I mean about the skin splitting? It will usually split off the end of one of the scores you cut into the bottom.
FIVE ------------------------------------------
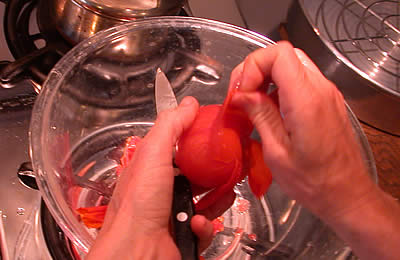
These next two pictures show you how easily the skins peel off now. Don't forget to cut out the core (stem end) while you're at it.
A word of caution: peeled tomatoes are VERY slippery! It's like trying to handle a greased watermelon (albeit much smaller). ;-) So just be mindful of this as you proceed, especially if you're working with a sharp knife.

SIX ---------------------------------------------
Another shot of the peel slipping off so very easily.
FYI, sometimes dry-farmed tomatoes can be finicky about relinquishing their skin. Pop 'em back into the boiling water a few more moments if they are being recalcitrant, then proceed as usual.
SEVEN -----------------------------------------
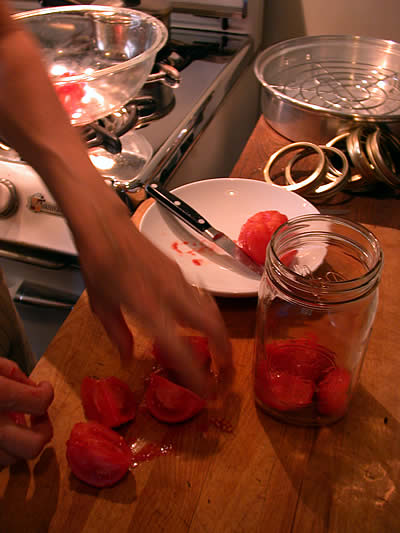
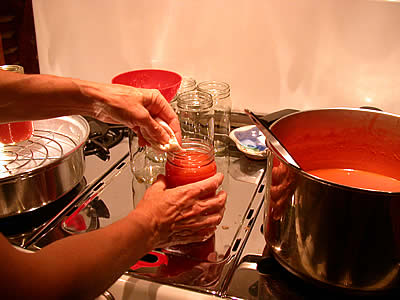
Cut the peeled tomatoes into quarters and begin filling a clean quart canning jar.
[Okay, I'm inserting this here to calm the roiling waters of controversy, as I've received a few emails about this. ;-) Some folks insist on adding a half-teaspoon of lemon juice or quarter-teaspoon of citric acid to each jar to assure that the acidity is sufficient. I have never done this myself, nor has the person who taught me (I believe), and I have never had a problem. My spidey sense says fresh-picked dry-farmed tomatoes are plenty acidic, and so the step is not necessary (if I were using "low acid" tomatoes, or dead-ripe soft ones [apparently when they get really ripe their acidity diminishes], I'd be singing a different tune) -- however without going into a lengthy discussion, I will simply state here and now: if in doubt, go ahead and add the additional lemon juice or citric acid. As one home canning site states, "cooking is an art, canning is a science." If you want to go by the book to be absolutely confident, please refer to the NCHFP (Nat'l Center for Home Food Preservation). The link I've provided is to their section about tomatoes, specifically. I am not going to advise "for" omitting the extra acid out or "against" putting it in. Please deal with this issue in whichever way makes you feel most comfortable.]
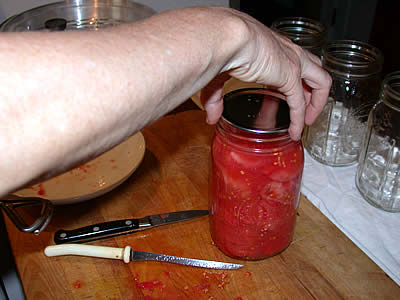
EIGHT ------------------------------------------
At about three-quarters full, use your hand to press the tomatoes down, removing the air spaces. (This is why I like wide-mouth quart canning jars, because you can fit your hand in. You can do it with the narrow necked jars, but you have to fill them closer to the top, then can only reach in with your fingers to 'pack' them down).
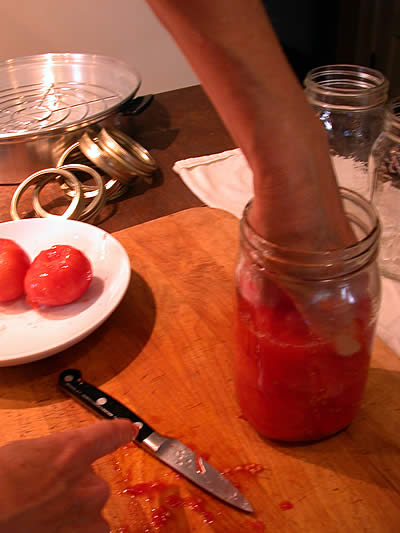
Continue to add tomatoes and squish down until the tomatoes come to about an inch below the lip of the jar.
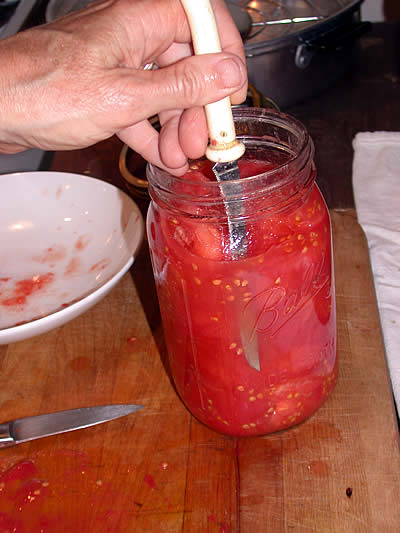
NINE --------------------------------------------
Inspect for air pockets; use a knife and run it around the outside of the tomatoes to release any trapped air. (I forget now why you do this in canning, but I remember it as a step, so I just do it.) ;-)
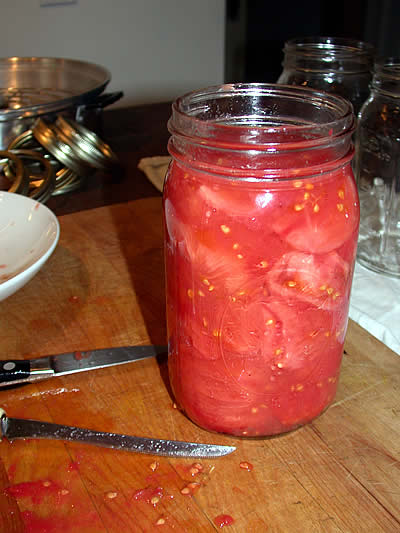
TEN --------------------------------------------
A filled jar, ready for a lid.
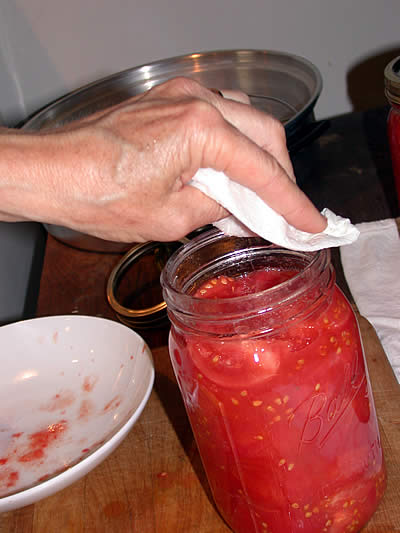
ELEVEN ------------------------------------------
Oops, almost forgot -- before you put the lid on, you want to wipe the rim of the jar clean so as to enable a good seal.
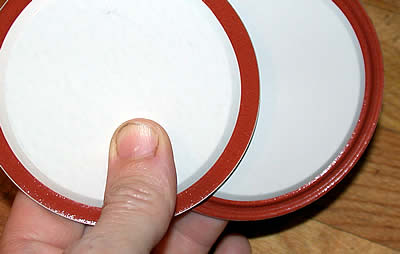
TWELVE -------------------------------------------
This picture I took just to show you the difference between a new and used canning lid. Note the groove in the rubber seal of the used lid (the one on the right). Always use new lids when you're canning. You can get them at grocery stores and hardward stores; they're easy to find. And cheap. Typical canning brands are "Ball" and "Kerr".
Although you never want to re-use old canning lids for canning, you can re-use them (with rings) on jars of stuff you're just going to keep in the fridge. Handy if you want to re-use canning jars for storing left-overs.
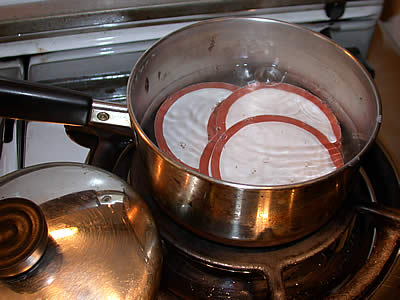
THIRTEEN ------------------------------------------
Bring a small pan of water to a boil and drop the lids in. Cover and turn off the heat. You don't need to keep them boiling, just hot. The boiling water sterilizes them, and also softens the rubber for a better seal.
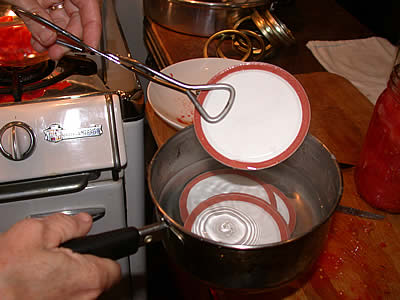
FOURTEEN ----------------------------------------
Use tongs to remove a lid from the hot water...
FIFTEEN -------------------------------------------
Carefully set the lid on top of the (cleaned) jar rim, then drop on a threaded ring and tighten gently, to an easy finger tight (do not screw them on really tight).
SIXTEEN -------------------------------------------
First jar is now filled and ready to go; now I just need to fill the other six!
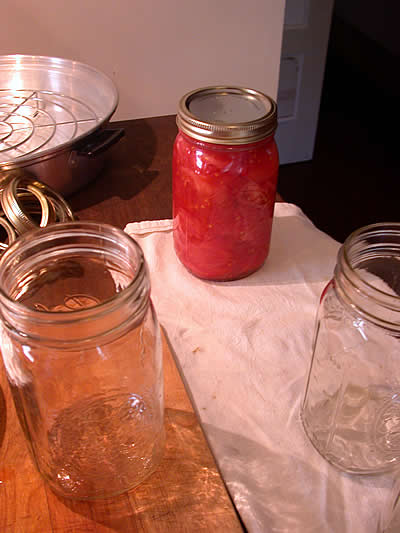
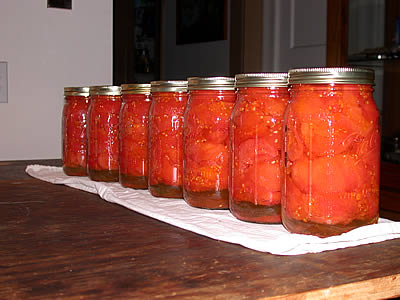
SEVENTEEN -------------------------------------
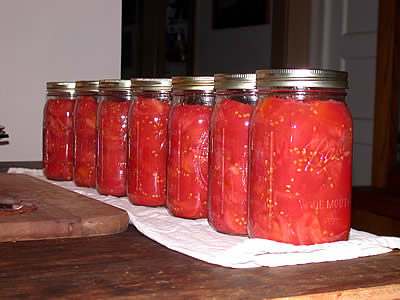
Here are all seven jars, ready to be processed. Note the "head space" (that one-inch gap between the top of the tomatoes and the top of the jar).
Why seven? That's the maximum that will fit in my steam canner at one time. ;-)
EIGHTEEN ------------------------------------------
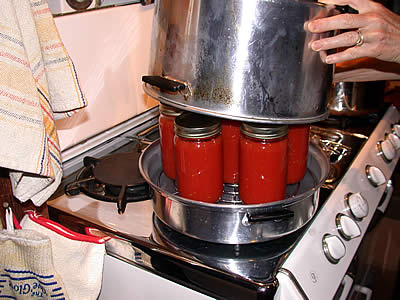
Here are the jars in the canner. They're sitting on top of a wire rack over about 8 cups of water, which has been brought to a boil.

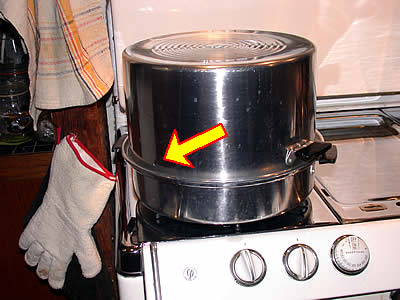
NINETEEN -------------------------------------------
On goes the lid, and as the water inside continues to boil, steam fills the lid. If you look very carefully you'll see a tiny hole in the lid, halfway between the handles (just above the bottom pan). When the steam pours outta here in a column, you start timing. The book sez 45 minutes.
TWENTY ----------------------------------------------
Once they're done processing, turn off the heat and carefully remove the lid in such a way as to allow the steam to escape away from you (so you don't scald yourself!)
TWENTY-ONE -----------------------------------------
These are verrrryyyy handy tools - the good ol' canning tongs! You'll see in a moment...

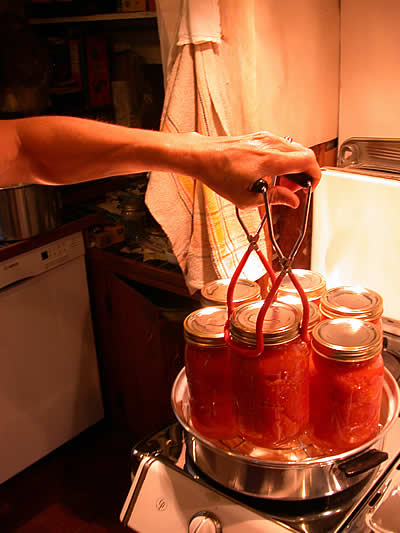
TWENTY-TWO --------------------------------------
Use the canning tongs to remve the (extremely!) hot jars from the canner after they've processed.
TWENTY-THREE -----------------------------------
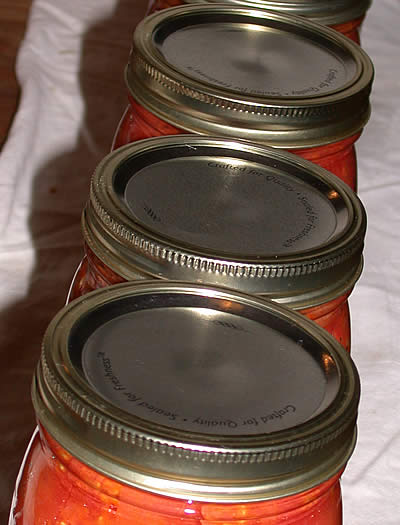
Here are my seven quarts, now processed. What happens is the tomatoes actually boil/cook inside the jars in the canner. This is why you don't tighten the lids down too hard; that air inside gets pressed out (often with a wee bit o' tomato juice too; sometimes the jars will be a little sticky after you remove them; just wipe them with a damp cloth. No harm done, as long as they sealed properly -- see next frame).
TWENTY-FOUR -------------------------------------
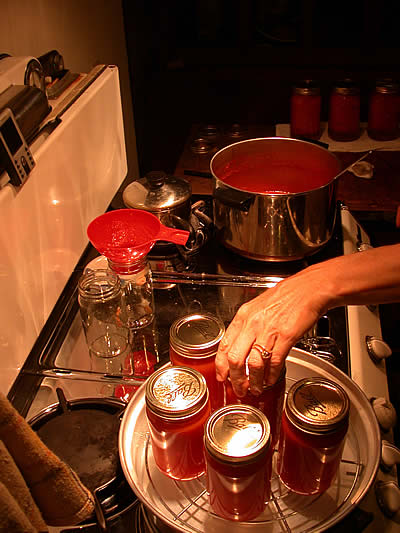
Nowadays, canning lids have this "button" on the top; if you look carefully, you'll see an upward-protuding bump in the middle of the lids. These cans are still hot, having just come out of the canner. However...
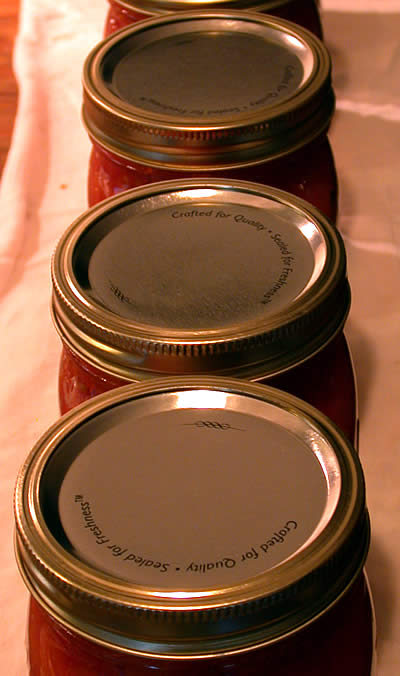
TWENTY-FIVE ------------------------------------
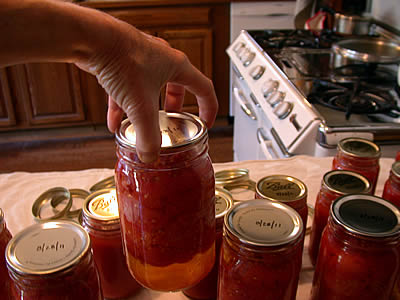
Once they cool down, the buttons will 'pop' down - often you'll hear them (a very satisfying metallic 'pink!'). That means a good vacuum seal has taken effect. That's what you want to happen. Allow the jars to cool completely.
If you're not going to make puree too, skip now to frame THIRTY-NINE for some final notes.
TWENTY-SIX ---------------------------------------
Making and canning tomato puree, or, how to can a bunch o' tomatoes without having to peel each individual one!
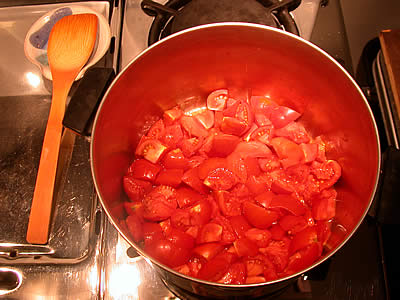
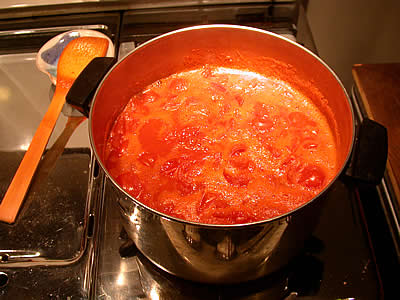
Cut tomatoes into large chunks (I just quarter them, then chop the quarters in half. If they're really small, you can just halve or quarter them. They don't need to be in small pieces). Put them in a nice large heavy-bottomed pot over a low flame.
I start the cooking process after I've cut up enough to cover the bottom of the pot. Mash 'em down a bit to get some juices flowing. Continue cutting tomatoes and adding to the pot, stirring occasionally, until you've cut up all that you want to can (or 'til your pot is full).
TWENTY-SEVEN --------------------------------------
Don't be in too big of a hurry here; too many times I've been in a hurry and turned up the heat and scorched or flat-out burned the tomatoes in the bottom of the pot! Remember, tomatoes are sweet... they're a fruit, which means they contain sugars, and sugars burn.
All you're trying to do in this step is to cook the tomatoes, just get 'em saucy and loose; not reduce them (not yet, anyway). You don't have to watch over them; you can cover the pot over low heat until it is simmering, and that means this step is done.
Remember how easily the skins came off the tomatoes in the blanching step (frames THREE through SIX, above)? You're just facilitating the removal of the skins in the food mill, which is the next step!
TWENTY-EIGHT ------------------------------------
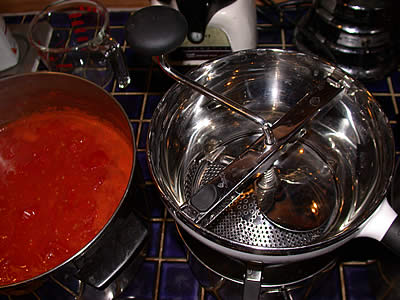
This is a food mill. It is sitting on top of another clean pot, ready to receive skin and seed-free puree. I've set the pot with the sauced tomatoes on the left there.
TWENTY-NINE ----------------------------------------
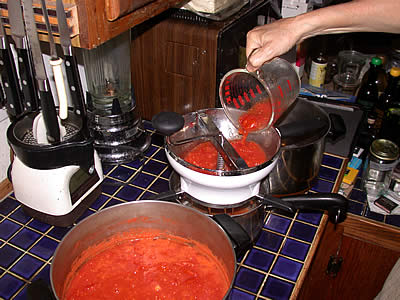
Ladle, scoop, or otherwise pour the sauced tomatoes into the food mill...
THIRTY ---------------------------------------------
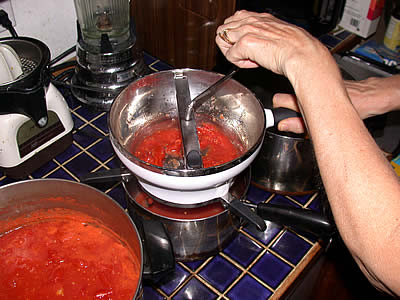
Turn the crank. The crank has a flange that smooshes the tomato pulp over a plate with holes in it, causing the pulp to descend into the pot below, but leaving the skins and seeds behind. (The mill usually comes with a couple plates with holes of different sizes; you can use a food mill to make things like applesauce too - same process: cook cut up apples, skins, cores and all, then run them through the mill to remove the skins and seeds.)
THIRTY-ONE ---------------------------------------
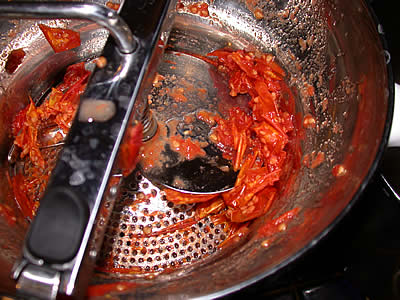
Here you see the skins and seeds left behind.
I usually process a few scoops of sauce at a time, and then pause to scoop out and discard the majority of the skin and seeds accumulating in the mill, then continue until I've processed all the sauce.
THIRTY-TWO -----------------------------------
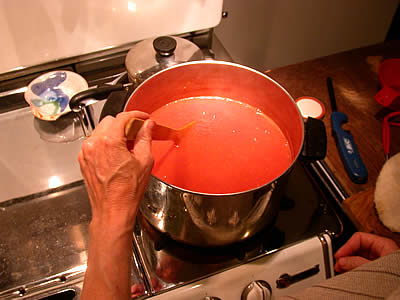
Now you have this nice pot of tomato puree with no skins or seeds (well, usually a few seeds get through, but the majority are removed in the mill).
Here's the step where you decide how much to cook down your puree. At the start, it is closer to a thick tomato juice; so it is just a matter of heating and reducing (by evaporation) your puree to the consistency desired, then filling jars and processing them.
If I just want a medium puree, I'll can it in pint jars; if I cook it down thicker, I'll can it in half-pint jars. It's really up to you.
THIRTY-THREE -----------------------------------
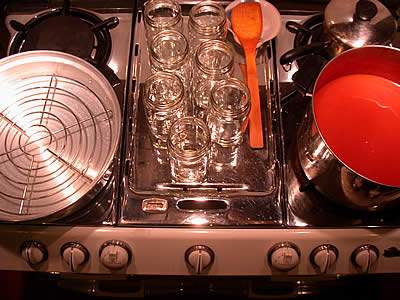
Okay, I've cooked the puree down some, and seven clean pint jars are standing at the ready to receive. Note the canner, at left (the wire rack over water).
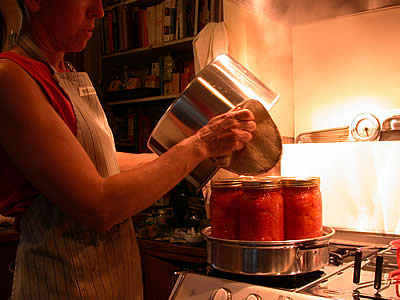
THIRTY-FOUR --------------------------------------
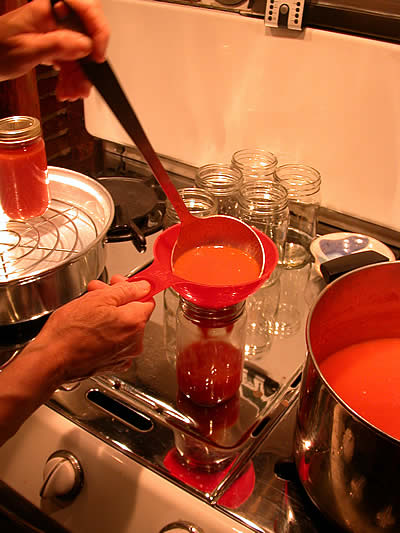
Using a handy-dandy canning funnel (another indispensable tool, like the tongs in frame TWENTY, above), ladle the hot puree into the clean jars, again, filling to about an inch from the rim (with the smaller jars and cooked puree, I go a little closer - about half an inch). Never fill to the rim; always leave some head space.
THIRTY-FIVE ------------------------------------
Again, using a damp cloth, wipe the rim clean, then fish a fresh lid out of the pot of hot water, place it on top, and screw on a ring (finger tight, not hard), as in frames THIRTEEN through SIXTEEN.
THIRTY-SIX ----------------------------------------
Load the filled jars onto the rack in the canner as you go...
THIRTY-SEVEN --------------------------------------
Once you've loaded all the filled jars (max capacity 7, whether pints or quarts), put the lid on and process same as in frame NINETEEN, above. With pints, it should only take 40 minutes. [That's the legal-ass-covering stated time; personally, I think it doesn't require as long, as you've just poured boiling hot tomato puree into the jars so it's not like the tomatoes are cold and need cooking like in the cold pack process described above -- but hey, I'll let you use your own judgement. It doesn't hurt anything to process them for 40 minutes, so might as well.]
THIRTY-EIGHT --------------------------------------
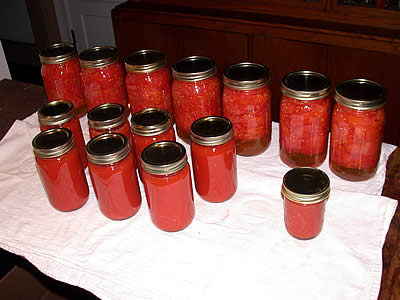
Remove the lid and lift the jars out (same as in frames TWENTY through TWENTY-TWO). I set them on clean cotton flour-sack towels to cool.
Note the half-pint jar on the lower right; this was where I off-loaded the odd remaining puree (if I'd cooked it down longer, it would've all fit into the seven pint jars, but ya kinda have to guess, and I guessed wrong) ;-)
Since this half-pint jar was NOT processed, I'm just going to stick it in my fridge once it is cool and use it in the next couple weeks.
THIRTY-NINE ------------------------------------
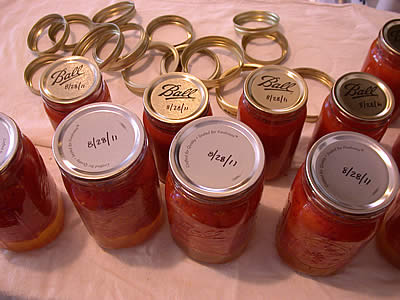
Next morning: the jars have cooled completely. Unsecrew and remove the rings (save for re-use; unlike the lids, the rings can be re-used, no problem. If they are sticky from juice that escaped in processing, wash in soapy water and dry well, then store 'til the next time you are ready to can again).
Don't forget to date the jars, so when you store them, you know how old they are. They'll keep a year on a shelf, easy. As long as you're going to cook with them, you could easily keep them longer than a year, but I like to more or less use them up by summer, then can a new batch for the coming year.
FORTY -----------------------------------------
Lastly: here's the ultimate test of how well the jars sealed -- after you remove the rings, try lifting the jar by the lid alone (grip around its edges and lift). If the lid pops off, that was not a good seal; put a lid and ring on it and stick it in your fridge and use it in the next couple weeks or so.
You should be able to lift the jar as shown without concern of the lid coming off. That is a well-sealed jar!
Note: when it comes time to open the jar to cook with them, that's where the rounded end of a good old-fashioned can/bottle opener (church key) comes in. Use it to break the seal. Works like a charm! (It ought to; that's what it is for!)
Store your canned bounty on a cool, dark shelf somewhere and enjoy! No need to refrigerate until after opening.
Cheers everyone! Hope you enjoyed my tutorial! :-) Debbie
[feel free to email me at deb@writerguy.com with questions or comments]