Notes from Debbie's Kitchen~~~~~~~~~~~~~~~~~~~~~~~~~~~~~~~~~~~~~~~~~~~~~~~~
Click here to go to recipe database. How's everyone
enjoying the fresh garbanzos? We're getting more this week (and everybody's
getting them! See last week's newsletter for how to use them). I'm also happy to report that the remaining members who didn't
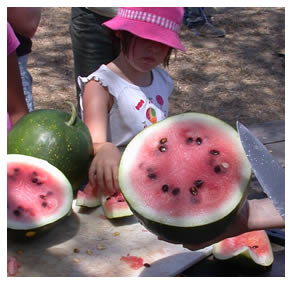
get watermelons a few weeks back will be getting theirs this week, and we have enough so that Fruit Bounty members will get one too! So I've got
a few more watermelon recipes to share, among other things. - Debbie
Inspired by
Lisa's story about the poem, I was compelled to find a watermelon pickle
recipe! And I knew right where to go to look for one too: my old Joy of
Cooking. The nice thing about this recipe is that only the rind is pickled, so you can enjoy the sweet juicy pink
flesh guilt-free, and then make good use of the rind afterwards. Keep in mind
this is a 3-day process, but based on the poem, it sounds worth it!
Pickled Watermelon Rind
from Joy of Cooking (1978
edition)
Makes 5 pints. [Original recipe made 10 pints, from 'one large watermelon';
since ours are smaller, I'm halving the recipe. I'm also editing it somewhat,
but not materially.]
Cut before peeling and remove the green skin and pink flesh from 1 watermelon
(about 2 1/2 quarts). Dice rind into 1-inch cubes. Par-blanch it (see below)
for 3 minutes, until it can be pierced with a fork, but do not overcook. Drain.
To Par-blanch: place prepared rind into a large quantity of cold water, bring
it slowly to a boil, uncovered, and continue to simmer for length of time
specified, then drain and plunge quickly into cold water to firm it and arrest
further hot-water cooking.
Combine the following ingredients and bring just to a boil to make a syrup:
3 1/2 C sugar
1 C vinegar
1/8 tsp. oil of cloves [don't know if this is still commercially available; I'd
just put a few whole cloves -- 5 or 6? -- into the solution and then simmer it
gently for a few minutes to infuse the syrup (let your nose be the judge), then
remove]
1/4 tsp. oil of cinnamon [ditto here; I'd just use a cinnamon stick]
In a non-reactive pot or bowl, pour syrup over rind, just covering it. Let
stand overnight. Remove rind. Reboil syrup and pour over rind. Let stand
overnight as before. On the third morning, pack the rind into sterile pint
jars. Boil syrup again and pour over rind to overflowing. [That's
interesting... no headspace? Usually when canning you leave about 1/4 to
1/2-inch of headspace. If you overflow it, don't forget to wipe the rims and
threads before sealing.] Seal and process jars 15 minutes in a boiling-water
bath [or steam-canner; that's what I have and like - uses a lot less water!].
The flavor of this pickle can be varied by placing a star anise, or 1 to 2
tsps. chopped preserved ginger or candied lemon peel into each jar [presumably
before adding the syrup].
Storing whole watermelons
Depending on who you
believe, whole watermelons will either keep only a week or so (per the National
Watermelon Promotion Board, which says, "whole melons will keep for 7-10 days
at room temperature. Store them too long, and they'll lose flavor and
texture.") - if they're promoting watermelons, maybe it's in their best
interest to have you use 'em up and purchase more? - or, according to a couple
stories from 'old timers', they can be stored uncut in a cool dark place for as
much as 6 months! One story told of "keeping a few under the bed, a cool place,
and bringing one out for dessert at Xmas time and birthdays. They were always
fine." Whether the newer species and small ones would keep so well, I do not
know. I think the long storage would apply if you had a garden that produced
several, which you couldn't use all at once...
Here's another watermelon recipe; even though we don't have cucumbers this
week, maybe we will in the future, and it sounds like you can safely store
watermelons in a cool dark place for a little while anyway...
Cucumber and Watermelon Salad with Hoisin-Lime Dressing
Bon Appetit, July 2002
Serves 6, but you could easily proportion it up or downward
1 1/2 large English hothouse cucumbers, cut into half-inch pieces, about 3 cups
[the Armenian 'snake' cucumbers would be a perfect substitute]
3 C half-inch cubes of seeded watermelon
3 1/2 tbsp. fresh lime juice
3 tbsp. hoisin sauce
1/4 C chopped fresh cilantro
2 tbsp. chopped fresh mint
1/3 C coarsely chopped lightly salted dry-roasted peanuts [or similar]
Combine cucumbers and watermelon in medium bowl. Cover and refrigerate at least
15 minutes and up to 4 hours. Drain; discard liquid [huh... you'd think the
juice would be good for something... a refreshing beverage perhaps?]
Whisk lime juice and hoisin sauce in small bowl to blend. Pour dressing over
cucumber-watermelon mixture and toss gently. Season salad to taste with salt
and pepper. Sprinkle with fresh herbs and peanuts, and serve immediately.
One more watermelon idea - this one was sent to me by member Amoreena Lucero:
Fresh Watermelon with Chili and Lime
Amoreena says, "So, for
those of us who haven't received our watermelons yet, I suggest eating
watermelon the way they do in Mexico, which is with a squeeze of lime juice and
a sprinkle of chili powder and salt.
It sounds weird, but having tried it in my restaurant days, I have to
say it's quite good! I'm sure some
of your crew can verify this delicious approach to watermelon. BTW, I thought of it because you
mentioned the same combination for the garbanzo beans." [Sure sounds yummy to
me!]
I've been jonesing to get tomatillos again ever since my friend Mary Murphy
served them for me in her paprika roasted veggies. They were
absolutely delicious that way! They're also tasty raw. Dean and DeLuca
describes tomatillos as having a "fascinating flavor somewhere between rhubarb,
apples, squash and persimmons" when eaten raw; as apt a description as I have
ever heard. I got some tomatillos a few weeks back and found they were
marvelous... in gazpacho! Here's my recipe:
Debbie's Gazpacho with Tomatillos
Gazpacho is very flexible
and forgiving; you can puree up quite a number of different summer veggies,
season with herbs and vinegar, and dig in! A couple weeks ago I came home with
a handful of tomatillos and, looking around my kitchen at what all else I had
in abundance, decided to make gazpacho.
I pretty much made a version of the
Garden Gazpacho recipe from
the database, only I didn't have any cucumber but I DID have these tomatillos,
and a lime. So here's what I put in my gazpacho this time:
Summer squash
Sweet peppers
Tomatillos
Tomatoes
Onion
Garlic
Lime juice [or lemon, or a bit of both]
Basil
Tomato juice [I had some
homemade, frozen]
and then balsamic vinegar, to taste.
While we're on the subject of tomatillos, here's another fun recipe I really
like the sound of:
Pizza Santa Fe Style (with Tomatillos! duh.)
from 'More Recipes from a
Kitchen Garden' by Renee Shepherd & Fran Raboff
serves 2 to 4
one pizza crust, ready to bake [or see my recipe, below]
Sauce:
1 1/2 C lightly packed cilantro leaves
1/2 C lightly packed parsley leaves
2 cloves garlic
1 jalapeno chile, halved, seeded [or a serrano from last week's box?]
1 scallion, cut in pieces
1 tbsp. lemon juice
1/2 C olive oil
salt and freshly ground pepper, to taste
Topping:
2 anaheim or other mild green chiles, roasted, peeled, seeded and cut into
half-inch strips [I'd use the Corno de Toro peppers from our box]
5 tomatillos, husked, rinsed and sliced
4 small tomatoes, sliced and drained on paper towels [I find if you cut them in
half crosswise then it's easy to scoop out the seeds, then slice. Hate to use
all the paper towels.]
1 small red onion, thinly sliced
salt and freshly ground pepper
1 tbsp. chopped fresh oregano or 1/2 tsp. dried
2 C grated jack cheese
Combine all sauce ingredients except salt and pepper in a food processor or
blender. Puree until smooth. Add salt and pepper to taste.
Preheat oven to 450 degrees F. Place crust on a large baking sheet [see my
notes if making homemade dough!]. Brush the shell with sauce. Arrange chilies,
tomatillos, tomatoes and onions over all, sprinkle with salt, pepper and
oregano.Top with grated cheese and bake for 5 to 10 minutes, until edges are
crisp, and serve hot.
Debbie's Pizza Dough Recipe
Okay, so Molly, this year's farm intern, has been using this recipe
for making all the pizza dough for events on the farm this year, and has asked
me several times to include it in the database. Here you go, Molly :-)
2 to 2 1/4 C all-purpose flour [sometimes a little more]
1 pkg. rapid-rise yeast
1 tsp. salt
1 tsp. sugar
1 tsp. olive oil
1 C warm water [125 to 130 degrees if you use a thermometer, but I find water
that's simply on the hot side of warm but cool enough you can stick your finger
in it without going 'ouch!' is fine. You don't want it tepid.]
In a large mixing bowl, combine 1 C of the flour together with the yeast, salt
and sugar. Add warm water and olive oil and stir well. I like to beat it
vigorously in a circular motion with a wooden spoon until it starts getting
ribbony. When you stop, observe it for a minute; you'll see bubbles from the
yeast action rise happily to the surface.
Continue to add flour and beat with your wooden spoon until the dough starts to
come away from the sides of the bowl in a mass; it'll still be somewhat sticky,
but this is okay.
Sprinkle a smooth counter or table top or cutting board with a goodly amount of
flour (not too skimpy) and have additional standing by. Turn the dough out onto
the floured surface, using a dough scraper if you have one, to get all the
stuck bits; sprinkle with more flour (and dust your hands with flour), then
knead dough: fold it in half towards you, press into it with the heel of your
hand to kind of moosh the two layers together, turn a quarter turn, fold,
moosh; turn fold moosh... keep this up, adding as little flour as necessary to
keep it from really sticking to you - more at the beginning, but taper it off
soon as you can. They always say to 'knead dough until smooth and elastic', but
the best indicator for finished dough consistency I've ever heard is to compare
it to the softness of your earlobe. Really! You don't want it too stiff or the
pizza will be more cracker-like instead of chewy with big air pockets (yum!).
You can let the kneaded dough ball rest on a little flour while you prepare the bowl:
wash it out, dry it, coat it modestly with olive oil. Take the dough ball,
tucking it kind of underneath and into itself on the bottom, then set it
briefly seam-side up in the oiled bowl (to very lightly coat it with oil), then
turn it over seam-side down. Cover bowl with plastic wrap or a damp
flour-sack-type towel (not terry), and let rest in a warm place to rise until
doubled in bulk (usually about 20 to 30 minutes, depending on how warm it is).
You can use it now, or, if you need more time to prep toppings and such, punch
it down, ball it up, turn it over, cover it and let it rise 'til doubled again.
If you have one, put a pizza brick or pizza stone (essentially a flat sheet of
terra cotta or similar, to simulate a brick oven) into your oven and preheat it
while the dough is rising. I like to heat my oven to 500, even 550 degrees for
pizza (with the brick; haven't tried this with pizza-on-a-baking-sheet).
Prepping the dough for making pizza on a pizza brick
If you're going to be baking the dough on a brick in your oven, obviously
you can't pre-assemble it on it's baking surface, like you can with a cookie
sheet. The dough sits directly on the stone to bake. So you have to prepare it
on either a pizza peel (a wooden or metal paddle for transferring into the oven),
or, what I use as my 'peel' is a rimless cookie sheet.
THE MOST IMPORTANT STEP here is to make
sure you have a sufficiency of dry
stuff (I use polenta and flour; you can use either or) between the dough and
the peel so the dough doesn't stick to the peel!!! When you're trying to slip a
pizza off your peel into a 500 degree oven, you can't hover and fuss trying to
get it off - ya hafta stick the peel in there so the dough is centered above the stone, give it a
quick jerk so the pizza slides off onto the stone, then get the heck outta there and shut the door! [It's hot!!]
So I sprinkle my rimless cookie sheet generously with the polenta, then
sprinkle on a little flour too, for good measure - then sprinkle the dough with
a little more flour, punch it down in the bowl, stretch it out and place it on
the prepared peel. A good trick I've found for making a nice round dough is to
punch it all around and flatten it right in the bowl, then you can lift out the
deflated disk, flip it over flour-side down, and lay it right on the prepared
peel. Now you're ready to top it with whatever toppings you desire, and bake!
In a 500 degree oven, I'll bake my pizza 10 to 12 minutes; check on it at 10.
Ideally you want the cheese on top to be browned and bubbly. [Ask me another
time for how I use this dough to make focaccia.] ;-)
Member Laurel Pavesi sent me this next recipe saying, "I just used [it] and
it is delicious! Out of this world with Tom's dry farm tomatoes, a sprig
of basil and a squeeze of Meyer lemon juice! Oh my! I used my food
processor to pulse the pulp with a little salt and then drained it in a
cheesecloth bag, just like [Andy] said. I've never, never tasted any better thirst
quenching drink. I doubt we'll have any left over for ice cubes!!" Note to our readers: Andy Griffin is the farmer at Mariquita Farm (part of Two Small Farms CSA), and he is also a terrific writer. You'll find his work published in many places, and it is always a good read!
Tomato Water
by Andy Griffin
The best chefs know how get the most out of their food budget. Extra tomatoes,
soft tomatoes and tomatoes that are too damaged or cosmetically challenged to
be of other use can be used for tomato water. First the ripe tomatoes are
chopped, then lightly salted, and finally put into a cheesecloth bag over a pot
and left to drain. The clear liquid that is captured has the clean, flavorful,
essence of tomato without any distracting catsup "notes" or pizza "tones".
Tomato water can be used to give character to vinaigrettes, sauces, broths,
juices and cocktails. Freeze the tomato water into ice cubes and bag them for
use in the winter. The pulp that is left behind can be used as the basis for a
sauce or broth.
And member Kimberly Potts wrote me with this idea for using greens (see
below for my additional comments):
Green Smoothies
Kimberly says, "Hi Debbie -
I've been meaning to write to you about a fabulous idea for using those greens
that SADLY too many people are leaving in the trades box! Of course we all know that they are THE
healthiest food on the planet, but seem to be a chore to make ourselves eat
enough of. I have been doing a lot
of research lately into the "raw/living" diet, and specifically
"green smoothies"! They
are THE best way to "get your greens" because blending them in a high
speed blender (preferably, anyway) breaks down those cellulose walls so that
the nutrients become much more available, yet it avoids cooking them which
destroys many nutrients and all the enzymes. When you mix the greens with fresh fruit, the fruit almost
totally masks the bitterness of the greens (depending upon the proportions of
fruit to greens and the type of greens used), making it a fantastic drink for
any time of day! Most experts in
this area suggest drinking about 3 cups a day. I start off each day with a big
ball jar full! I use whatever
fruit is in season, but bananas make it really creamy, and peaches or mangoes
make it really sweet [but bananas and mangoes are not local...]. I alternate the greens between spinach,
chard, collards, kale, dandelions, parsley, radish greens, beet greens, carrot
tops, mizuna, bok choy, romaine or any dark leaf lettuce, watercress, &
wild edibles like purslane.
Basically whatever we get in the share, and maybe another bunch
purchased at a farmer's market.
"It works well to start with about 60% fruit and 40% greens, depending upon how
tolerant you are of the greens taste... I love to add ginger regularly, and add
chia seeds daily, too. That makes
it really creamy and so good for you!
Blending with a Vita Mix is kind of essential... you can get by with a
"regular" blender but it may not be as smooth and creamy.
"There are more recipes and info. out there on green smoothies than you could
ever want. Lots of good sound
research as well. There is even an
International Green Smoothie Day (Aug. 15)!
Here are some to get started with:
http://www.greensmoothierevolution.com (Victoria Boutenko is THE authority on
greens and has done extensive research)
http://www.rawfamily.com/prodlinks/gfl.html
http://www.greensmoothiequeen.com"
- Kimberly
Debbie's two cents: I am all for getting plenty of healthy greens into your
diet, but don't personally advocate an 'all raw' diet... Sally Fallon, in her book
'Nourishing Traditions, the cookbook that challenges politically correct
nutrition and the diet dictocrats' says, "While we should include a variety of
raw foods in our diets, we need to recognize that there are no traditional
diets composed exclusively of raw foods. Even in the tropics, where fires are
not needed for warmth, the inhabitants build a fire every day to cook their
foods. Some nutrients are made more available through cooking and cooking also
neutralized naturally occurring toxins in plant foods. In general grains,
legumes and certain types of vegetables should be cooked. Animal foods should
be consumed both raw and cooked. Some people do very poorly on raw foods - or
find raw foods unappetizing - in which case they should emulate the Asians by
including small amounts of enzyme-rich condiments [usually fermented] with a diet
of cooked foods." I'd recommend getting this book from the library if you're
interested in learning more.

 Food is an expression of who we are and what we value. The kind of food we eat is a deliberate and well-considered choice. Your participation in Community Supported Agriculture (CSA) is a choice which supports the links and connections upon which we can build sustainable, local food system.
  I am excited that we have come to a point where we are able to offer our shares all year round. At the end of September we will once again give our current membership the opportunity to sign up for our very popular
 When the purpose of knees
  Mothers, fathers, grandparents, caretakers of any kind... bring the babe in your arms to experience the diversity of our beautiful organic farm here in Watsonville. We will use our five senses to get to know the natural world around us. The farm is home to over 50 different fruits and vegetables, chicks, chickens, goats, piglets, and the many wild members of the Pajaro watershed.