|
What's in the box this week
~~~~~~~~~~~~~~~~~~~~~~~~~~~~~~~~~~~~~~~~~~~~~~~~
Content differences between Family and Small
Shares are in red; items
with a "+" in
Family Shares are more in quantity than in Small; anticipated quantities, if
any, are in parentheses, as is the source of any produce not from Live Earth
Farm (LEF). Occasionally content will differ
from this list (typically we will make a substitution), but we do our best to
give you an accurate projection.
[go to recipe database]
Family Share
Fuji apples (10)
Red (Forono) beets w/greens
Cabbage (red or green) (2)
Chantenay carrots (topped and bagged) +
Chard
Collard greens
Red Russian kale
Leeks (3)
Romaine lettuce (2) (Lakeside)
Red radishes
Oyster mushrooms 1/2lb (Ortiz Mushroom Farm, San Juan Bautista)
Small Share
Fuji apples (6)
Red (Forono) beets w/greens
Chantenay carrots (topped and bagged)
Chard
Collard greens
Red Russian kale
Leeks (2)
Romaine lettuce (1) (Lakeside)
Red radishes
Sunflower sprouts or pea shoots ¼ lb. (New Natives)
Extra Fruit and Fruit Bounty Options
(remember: fruit options don't begin until May)
Bread
This week's bread will be 3-seed whole wheat
|
Greetings from Farmer Tom
~~~~~~~~~~~~~~~~~~~~~~~~~~~~~~~~~~~~~~~~~~~~~~~~  I love this time of year when everything springs to life. Fragile flowers and leaves push through their protective winter coats, like innocent children they thrust themselves into the world to begin a new lifecycle. You can imagine how everyone on the farm is acting like excited and anxious parents, welcoming the beginning of our 14th farming season. One might think it's routine by now, but as with any birth it's always a uniquely renewing experience. Things happen so fast; the Warren Pears exploded into full bloom last week which is our one and only opportunity to hand pollinate the flowers, a practice we have perfected over the years, to ensure abundant fruit set. The apricots are already swelling into tiny green fuzzballs, the Santa Rosa plums have set fruit and are shedding their flower petals. The first strawberries are turning red, and everyone in the family (but especially Elisa, our 4 year old) is constantly drawn to the strawberry patch behind the house, searching for the reddest and sweetest among them. I love this time of year when everything springs to life. Fragile flowers and leaves push through their protective winter coats, like innocent children they thrust themselves into the world to begin a new lifecycle. You can imagine how everyone on the farm is acting like excited and anxious parents, welcoming the beginning of our 14th farming season. One might think it's routine by now, but as with any birth it's always a uniquely renewing experience. Things happen so fast; the Warren Pears exploded into full bloom last week which is our one and only opportunity to hand pollinate the flowers, a practice we have perfected over the years, to ensure abundant fruit set. The apricots are already swelling into tiny green fuzzballs, the Santa Rosa plums have set fruit and are shedding their flower petals. The first strawberries are turning red, and everyone in the family (but especially Elisa, our 4 year old) is constantly drawn to the strawberry patch behind the house, searching for the reddest and sweetest among them.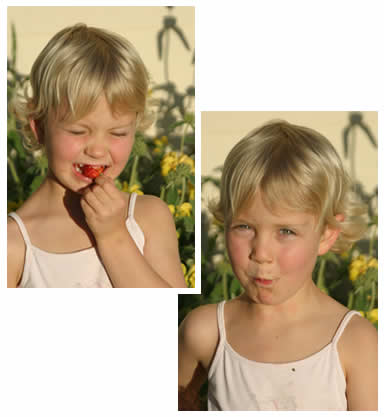 Now that the soils are drying, the farm tractors are busy from dawn to dusk mowing cover crops and preparing the fields for Spring planting. Seed potatoes are already in the ground, the early field-sown green beans and sugar snap peas are already germinating, and the first wave of vegetable starts have been field transplanted, relieved from their confined plugs in the seedling trays. Now that the soils are drying, the farm tractors are busy from dawn to dusk mowing cover crops and preparing the fields for Spring planting. Seed potatoes are already in the ground, the early field-sown green beans and sugar snap peas are already germinating, and the first wave of vegetable starts have been field transplanted, relieved from their confined plugs in the seedling trays.
With the start of our 14th Community Supported Agriculture Season we are happy, once again, to share with you the fresh, tasty, and bountiful harvest this season has in store for us. A warm welcome to all new and returning members! It is your commitment towards Community Supported Agriculture that has allowed us to gradually grow into a 700 member Community Farm. It is truly exciting to know that our choice to eat local and seasonally grown foods is a promising shift towards a more sustainable food and farming movement here and in many parts around the world. The number of CSA Farms in the United States alone has grown to over 2000; Farmer's Markets have sprung up in communities around the country; and restaurants as well as food retailers are increasingly sourcing from local producers rather then large corporate and globally-oriented ones. Who knew a year ago that even the White House was going to replace a patch of its lawn with a vegetable garden, showing welcome leadership in support of the thousands of garden projects sprouting up in our schools and homes. We can't predict what the future will bring, but I am convinced that paying attention to the regenerative power of growing healthy soil is an exciting step towards building the foundation of a healthier diet and at the same time protecting the environment we live in.
 Sometimes I wish I could follow the boxes of produce leaving the farm every week to their final destination in your homes, to experience how the food we grow ends up on your plates prepared into meals. But short of multiplying myself, my hope is that you take the opportunity to visit the Farm and enjoy the numerous activities and events taking place throughout the season, whether it's the monthly community farm days to be held the last weekend of every month (starting in May - see our calendar below), joining the always fun-filled seasonal farm celebrations, or participating in any of a number of hands-on workshops (i.e. cooking, gardening, permaculture, sustainable building, and habitat restoration) held throughout the year. We hope you see the farm as a resource and a place to enjoy a deeper connection with the people and the land that nourishes us. - Tom Sometimes I wish I could follow the boxes of produce leaving the farm every week to their final destination in your homes, to experience how the food we grow ends up on your plates prepared into meals. But short of multiplying myself, my hope is that you take the opportunity to visit the Farm and enjoy the numerous activities and events taking place throughout the season, whether it's the monthly community farm days to be held the last weekend of every month (starting in May - see our calendar below), joining the always fun-filled seasonal farm celebrations, or participating in any of a number of hands-on workshops (i.e. cooking, gardening, permaculture, sustainable building, and habitat restoration) held throughout the year. We hope you see the farm as a resource and a place to enjoy a deeper connection with the people and the land that nourishes us. - Tom
|
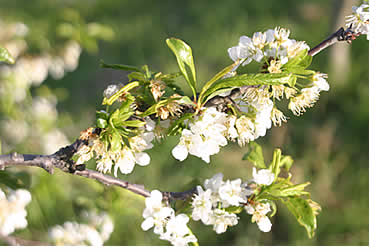
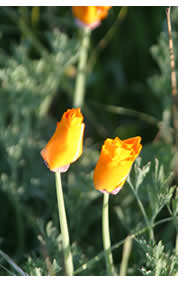
More pictures from around the farm~~~~~~~~~~~~~~~~~~~~~~~~~~~~~~~~~~~~~~~~~~~~~~~~ 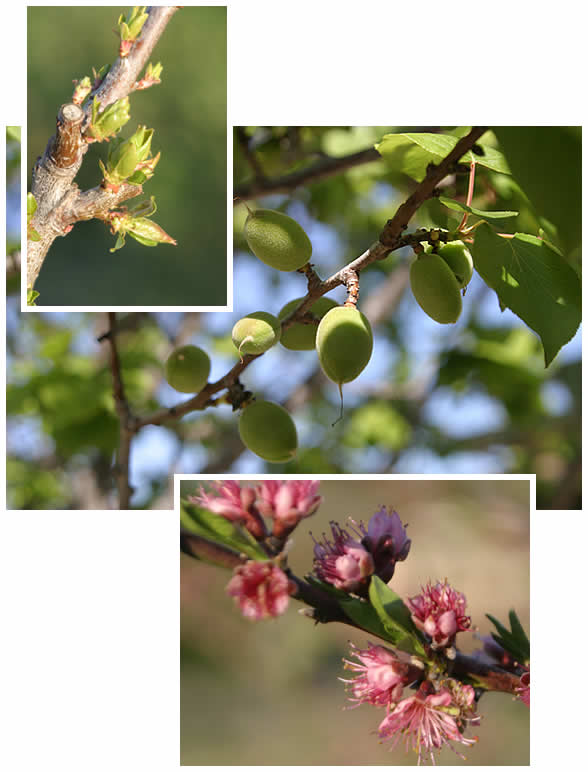 Buds on the Warren Pears, fuzzy green apricots, quince blossoms... and...  STRAWBERRIES!!!
|
|
Matching share-splitters with one another?
~~~~~~~~~~~~~~~~~~~~~~~~~~~~~~~~~~~~~~~~~~~~~~~~
On occasion I get phone calls or emails from people who want to be matched up with a partner to split a share. We just don't have the time or resources to manage this here on the farm, but it seems that there ought to be some technological solution! Are there any 'techies' out there who know a way to create an electronic 'bulletin board' which could reside on our website, where folks could post that they're looking for someone to split a share with? The important thing is that this would need to be self-maintaining, i.e. the farm would not be involved except to host page the page on our website. If anyone knows of anything like this, email us at the farm! - Debbie
|
Grow a Farmer - help save UCSC's organic farmer training program!~~~~~~~~~~~~~~~~~~~~~~~~~~~~~~~~~~~~~~~~~~~~~~~~ In 1995 our very own Farmer Tom apprenticed at the UCSC Farm & Garden (part of UCSC's Center for Agroecology & Sustainable Food Systems). His apprenticeship there was what gave him his start in farming, immediately after which he was inspired to start Live Earth Farm - which has grown it into the incredible CSA program we now have! But now the future of this world-renowned apprenticeship program is at stake, because of a new requirement on campus that the students must live in proper housing, rather than in the tents which had served them so well over the past 40 years. Hence the Grow a Farmer Campaign was created, so that UCSC can continue their work training the next generation of organic farmers and gardeners (we all know how important that is!!). The UCSC Farm already has the permission and the architectural plans to build eight 4-room cabins, now they just need to raise $250,000 by June to complete the funding for the project. The good news is that this will help build a solid foundation for the apprentice program and the residential facilities will help keep the program more affordable and accessible for years to come. Through the Grow a Farmer Campaign UCSC is enlisting the help of farm-loving businesses, restaurants, organizations, and individuals, with a focus on May as Grow a Farmer Month. Restaurants like Alice Waters' Chez Panisse and David Kinch's Manresa are planning benefits in the month of May, along with dozens of other local and regional restaurants. Businesses like Earthbound Farm, Veritable Vegetable, and Johnny's Select Seeds have pledged sponsorships. You can help too! Please go to http://growafarmer.org/ to learn more, to make a donation, or to see how you can support this effort by shopping or eating at the restaurants and businesses that will be part of the Grow a Farmer Month. You can find out more about the Apprenticeship Program, about visiting the UCSC Farm & Garden, and about the other programs of the UCSC Center for Agroecology & Sustainable Food Systems by going to http://casfs.ucsc.edu/. All questions and requests for more information are welcomed at growafarmer@ucsc.edu or call Ann Lindsey, at (831) 566-3779. THANK YOU! 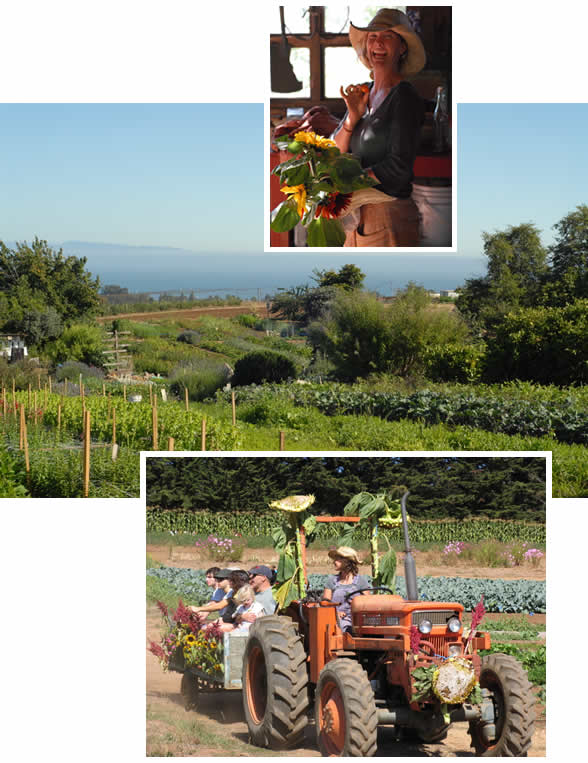
|
Notes from Debbie's Kitchen
~~~~~~~~~~~~~~~~~~~~~~~~~~~~~~~~~~~~~~~~~~~~~~~~ Click here to go to recipe database.
Hi everybody! I always like to dedicate the recipe section of the first newsletter of a season to our newby members... folks who are new to CSA, or those who are tentative or shy about cooking with the kinds of veggies you get in a CSA box. The old hats know what they're doing, and are comfortable with each week's new supply, so I'm not worried about them. They like to read new and interesting recipes sure, but they're less dependent on anything I might say to get them through the week! - Debbie
So let's start with greens.
Greens... learn the technique for basic cooking of greens, and then you can use them all sorts of places! In egg scrambles for breakfast (maybe with onion and mushrooms); tucked into quesadillas for lunch, or as a side green or ingredient in the makings of something for dinner.
Debbie's basic greens cooking technique:
First, evaluate the tenderness of the greens you'll be using - on the tougher/firmer end of the scale, we have collards and Lacinato kale. In the middle are Red Russian kale and beet greens (and greens from veggies like rutabagas), then next maybe chard. On the tender end are things like spinach, mustard greens, radish greens and arugula.
Generally speaking the tougher/firmer greens will want a longer cook time and the tenderer ones a shorter. Cooking time (and technique) also affects the texture of your cooked greens: some folks like their greens al-dente, others silky soft. There are always exceptions to rules (okay, almost always), but if you want somewhere to start, this will get you going!
Basic technique: boiling.
Best for the firmer greens: collards, kale, beet greens. I wouldn't boil spinach, mustards, or arugula... I might boil chard. Bring a pot of well salted water to a boil. Wash greens as needed to remove dirt and the occasional bug, then strip greens from stems (grasp stem in one hand, slide leaf through the grasp of your other hand and strip them off - this is MUCH easier than trying to cut the leaves from the stems with a knife!). No need to chop before boiling! (I'll talk more about this below.) Drop leaves into boiling salted water, turn heat down to medium-ish - it just needs to simmer it doesn't have to be a roiling boil - and cook 3-5 minutes. (Quantity affects cooking time too, so if you're doing a larger amount, like a couple bunches at once, it may take a little longer. 3-5 minutes is fine for one bunch of kale or collards.) A longer boil time will make the greens more tender and soft. If you like them firmer, don't cook them as long. Over time you'll come to learn what you like best!
A note re: pot-size - greens cook WAY down in volume, so you don't need a giant pot (though at the start it may look like you will). Just add the greens a handful at a time if they won't fit all at once, and they will quickly wilt and make room for the rest.
Once the greens are cooked to your liking (you can always fish a piece out and try it, just like you would with pasta), drain them well, squeezing out the water by pressing them with a wooden spoon against your colander, then plunk them onto a cutting board. NOW chop them. I find it is WAY easier to chop the greens after cooking than before. If you do it before, you're working with a large unwieldly pile and have pieces going everywhere; afterwards, however, you have a nice manageable clump which can be chopped as coarsely or finely as you like. This is SO MUCH EASIER.
Basic technique: steaming.
Steaming is great for the delicate greens like spinach. It works fine for the firmer greens too, although I find kale cooked this way to be a little less tender (if you want that 'silky' feel, boiling works best). But if you like this al-dente-ness in kale, it's a great way to go - uses less water, and some say less nutrients are lost because the greens are not immersed in water. I don't know enough about this fact to say.
The steps for steaming are essentially the same as for boiling, above, except I will sprinkle salt onto the leaves since they're not immersed in salted water. FYI the salt sticks better if the leaves are a little wet (clinging water from washing is fine, otherwise sprinkle a little in).
Basic technique: sautéeing.
Most recipes for sautéed greens include other ingredients and the sautéing instructions are a part of the overall recipe, but if you ever want to make plain sautéed greens, it's easy. In this instance, you WILL want to chop your greens before cooking (so it's a little messier in prep). The most imporant thing to remember here is that the greens will need moisture - you don't want to dry-sauté them or they come out tough. Water clinging to leaves after washing is usually sufficient moisture. Just heat a skillet or wok with a little oil, then add greens and stir-fry. You can turn heat to medium and put a lid on it for a few minutes (which is essentially steaming them), or continue to stir-fry and watch, adding a splash of more water if it gets too dry.
Quesadillas with greens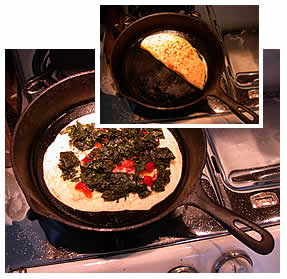
I do this for lunch a lot - just cook up some greens according to one of the basic techniques, above, then have them standing by while you prepare the quesadillas: melt a little butter in a skillet, lay in a tortilla, put some cheese on top (jack, cheddar, whatever you like or whatever you have!), then put some of the chopped cooked greens on top of this. Fold over and voila! Of course you can add other goodies to your heart's delight: in the photo here, I added some cilantro, corn kernels and diced red pepper (which I had in my freezer from last fall's peppers). Serve with your favorite hot sauce!
Hot Salad
A favorite of mine, I'm only putting this here for people who haven't heard me talk about it yet (most of you have). But I'm not going to re-describe it; just click here or here (two entries) and read all about it!
Tuesday night frittata
This recipe was sent in by member Colleen English, who says this is their 'family tradition' for Tuesday nights... i.e. the night before they get their new weekly box!
"Every Tuesday I clean out the veggie drawer and cook it all in a little bacon fat. I then add a bunch of beaten eggs and cheese on top and bake. It is a good way to use up the kale and chard when it isn't quite as fresh as it was 5 days earlier, still very tasty." - Colleen
Okonomiyaki (Japanese "Pizza")
Serves 1 - 2
This wonderful find was sent to me by member Jessica Gillis. It is essentially a thin, crispy griddle- or skillet-fried cake of cabbage and leeks (the 'crust') onto which any number of ingredients can be added as toppings, like a pizza! Click here for the full article from 101Cookbooks.com, but here is the recipe:
2 C cabbage, finely shredded [some of us may be getting red cabbage; I wouldn't be afraid to use it here just like I would the green]
1 C leeks (white and light green part), well washed* and chopped
2/3 C whole wheat pastry flour (or all-purpose flour)
a couple pinches of fine grain sea salt
2 eggs, beaten
1+ tablespoon olive oil
Garnish/topping: toasted slivered almonds, chives/herbs [how about some of those oyster mushrooms, sautéed up?]
* [Leeks have dirt under their leaves, usually right below the V where the dark green leaves meet the stalk, so be sure to watch for this! You can always slice the leeks lengthwise and wash in cold water, separating the layers to make sure you get the dirt out.]
Combine the cabbage, leeks, flour, and salt in a bowl. Toss until everything is coated with a dusting of flour. Stir in the eggs and mix until everything is evenly coated.
Heat a large skillet over medium heat and add a generous splash of olive oil. Scoop the cabbage mixture into the pan, and using a metal spatula press it into a round pancake shape, flat as you can get it. Cook for 4-5 minutes, or until the bottom is golden. To flip the okonomiyaki, slide it out of the skillet onto a plate. Place another plate on top and flip both (together) over. If you need a bit more oil in your skillet, add it now, before sliding the okonomiyaki back into the skillet. Again press down a bit with a spatula and cook until golden on this side - another 3 -5 minutes.
When you are finished cooking, sprinkle with toasted almonds and chives, and slide it onto a cutting board to cut into wedges. Enjoy immediately.
Hazelnut and radish greens pesto
Another member contribution: this interesting recipe comes courtesy of Laurel Pavesi, who found it online on deliciousdays.com. Yes - radish greens are edible! I'd make this in the first day or so after you get your box, while the greens are still really fresh. I don't know the metric equivalents, but I wouldn't worry about that too much; just look at the proportions of ingredients relative to each other, so, equal measure of greens and cheese, less of nuts, more of oil... ;-)
40g radish greens (from organically grown small red radishes)
1 garlic clove
25g chopped hazelnuts (without skins)
40g Grana Padano
coarse sea salt
freshly ground black pepper
80-100 g rapeseed oil [rapeseed oil is canola oil]
Toast the chopped and skinned hazelnuts in a small pan over medium heat until golden brown and fragrant, then set aside. Peel and coarsely mince the garlic, then grate the cheese.
Cut off the leaves from the small red radishes (I didn't use the thicker stems) and wash them thoroughly under cold water as they tend to be quite sandy. Throw in a salad spinner until dry or pad dry on some paper towel.
Put radish greens, toasted hazelnuts, grated cheese, a pinch of salt and black pepper as well as about 3/4 of the rapeseed oil into your kitchen blender and briefly blend until the pesto reached your desired consistency (of course you can also use a mortar). Add more rapeseed oil, depending on how saucy you want the pesto to be, then season to taste with more salt, pepper or grated cheese. Keeps in the fridge (always keep the surface well covered with oil) for several days.
Serve with mozzarella di bufala, on crostini or pasta.
Lastly, here is a recipe sent to me by member Jen Sorenson, who says, "This is something I whipped up fast for my starving family after picking up our share this week. Steaming the beets in the microwave as a cheat, browning the kale in butter, and using precooked greenwheat freekeh from TJ's made this a quick and yummy meal." Never having heard of 'greenwheat freekeh' before, I looked it up: it is a grain product made from roasted green wheat.
Ruby Greenwheat Freekeh with Kale
by Jen Sorenson
6 baby beets (steamed and sliced) [or less, if the beets are bigger]
1 bunch of kale (stems removed - coarsely chopped)
1 garlic clove (minced)
1 package Trader Joe's greenwheat freekeh
2 tbsp. butter (divided)
1/4 C garlic wine vinegar
1/2 C water
Melt half of the butter over medium heat. Add garlic and stir for one minute. Add kale and stir until leaves are bright green (2-3 mins). Add garlic wine vinegar and water and cook until water is absorbed (3-5 mins). Add greenwheat freekeh and remaining butter and stir until heated through (2-3 mins.) Salt to taste and serve.
Excellent as a steak side dish and we just happened to use kale but I'm sure this would work equally well with any of the greens.
|
|
2009 CALENDAR
~~~~~~~~~~~~~~~~~~~~~~~~~~~~~~~~~~~~~~~~~~~~~~~~
Here is the current schedule, and we will update the calendar here in the newsletter regularly. You can also get more information from the calendar on our website.
NEW!! Farm Workshops/Lectures
this is an idea that is still forming...
Possible subjects to include Permaculture, Fermented Foods, Farming with
the Wild... stay tuned!
NEW!! Community Farm Days
Every 4th Saturday of the month from May through October, 9am - 4pm
Participants are welcome to arrive Friday evening and camp out overnight
to Saturday. Please leave
your dogs at home, thanks! The intent of Community Farm Days is
to increase the opportunity for members and their families to experience and
enjoy a slice of "life
on the farm" at different times of the year - kind of like our old
Mini Camp, but for members of all ages! Each month will have a different activity
focus, and will be announced in advance here in the newsletter.
'Healthy Cooking' workshop
Saturday April 18th (see blurb in Winter Week 8 newsletter)
Apricot U-Pick Days
two Sundays: July 5th and July 12th
Bring your own bags.
Summer Solstice Celebration
Saturday June 20th <---note new date!
[click here for a short YouTube video of our 2007 celebration]
*** Children's Mini-Camp has been discontinued, and is being replaced with the above-mentioned Community Farm Days. ***
Fall Harvest Celebration
Saturday October 24th
[and click here for a YouTube video of our Fall celebration!]
|
|
