|
What's in the box this week
~~~~~~~~~~~~~~~~~~~~~~~~~~~~~~~~~~~~~~~~~~~~~~~~
During the winter season there are no 'Family' or 'Small' sized shares - everybody gets the same size box! As usual though, content can sometimes differ
from this list (typically we will make a substitution), but we do our best to
give you an accurate projection.
[go to recipe database]
Winter Share
Apples (lots!)
Apricot jam (from LEF apricots; canned at Happy Girl Kitchen Co.)
Beets, red
Brussels sprouts
Cabbage, green
Carrots
Cauliflower, Romanesco
Celery (Lakeside)
Chard
Kale, red Russian
Lemons, Meyer
Lettuce (different kinds)
Pickled dry-farmed tomatoes and basil (LEF tomatoes and basil; canned at Happy Girl Kitchen Co.)
Butternut squash (3-4)
Bread Option
This week's loaf is whole wheat sesame seed
Not that they haven't ALL been wonderful, but the first share of the
winter season was so vibrant and colorful that as I was taking things
out of the bag to prep for storage, I just had to spread them out and
take a picture! [I meant to run this last week but got sidetracked.] So
for those of you not getting a winter share, you can simply enjoy the
eye candy! Oh, and the jar in the middle background is apricot jam,
made from last summer's apricot crop. - Debbie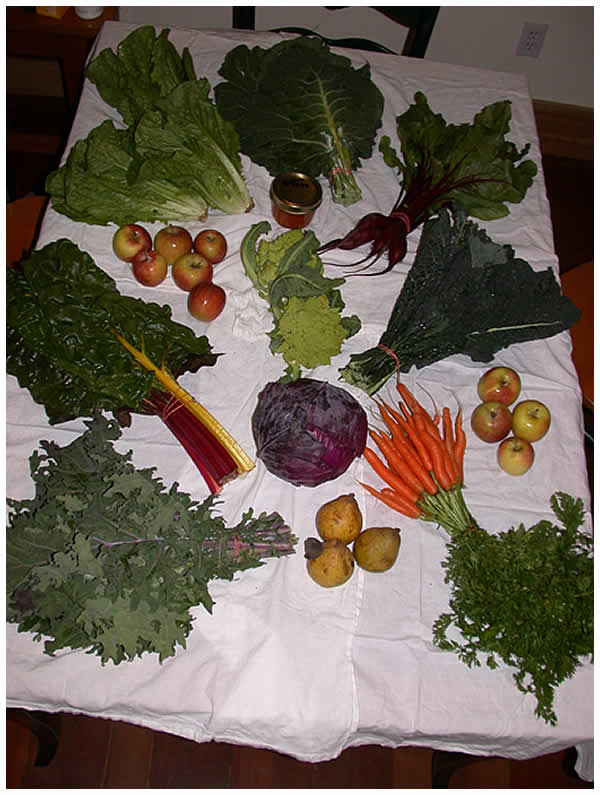
|
Taste of Soil
~~~~~~~~~~~~~~~~~~~~~~~~~~~~~~~~~~~~~~~~~~~~~~~~  As you open your share your eyes typically encounter a lush layer of leafy greens, which you are probably so used to seeing every week that your hands will instinctively part the green canopy of leaves to search deeper down, to see if something else may peak your attention (other than the diversity of textures and hues of green). At this time of year it's the carrots, with their vivid flashes of orange, you'll notice first. As you pull them out of your box among the hardy winter greens, imagine a similar, almost magical, experience happening in the field when we pull them out of the ground. It's the root that holds one's interest, emerging from the dark soil, it's as if one discovers an earthen treasure. The forces of this plant are all in the root, forces of the earth coming to light. As you open your share your eyes typically encounter a lush layer of leafy greens, which you are probably so used to seeing every week that your hands will instinctively part the green canopy of leaves to search deeper down, to see if something else may peak your attention (other than the diversity of textures and hues of green). At this time of year it's the carrots, with their vivid flashes of orange, you'll notice first. As you pull them out of your box among the hardy winter greens, imagine a similar, almost magical, experience happening in the field when we pull them out of the ground. It's the root that holds one's interest, emerging from the dark soil, it's as if one discovers an earthen treasure. The forces of this plant are all in the root, forces of the earth coming to light.
Fresh out of the ground, carrots smell like the rich soil they grew in, but it's the sparkling orange that triggers the irresistible desire to take a bite, anticipating crunchy sweetness and ....the mild flavors of soil. We typically don't associate something tasty with soil, most kids in our fast food culture start salivating when they see the Golden Arches of Mac Donalds but make faces of disgust when asked to hold a handful of soil in their hands. 
Just as Winemakers believe that the flavor and quality of a wine has a lot to do with the "terroir", the soil in which the grapes are grown, I am sure our vegetables and fruits express similarly, flavors characteristic to the soil they are growing in. The french word "Terroir" translates to mean " a sense of place" or a taste of soil. It's a complex and probably controversial concept, but so are soils. I know that vegetables taste different depending where in the fields they are grown. Soils vary from field to field, and within a field, they change from one planting block to the next, especially if there is a slope. The top of a field can be heavy and shallow, whereas the bottom is loamy and sandy.As soils vary, so will our farming practices. Watering shortly before harvesting always reduces the intensity of a crop's flavor, this is especially true for strawberries or tomatoes. When it comes to soil nutrients, the soil's fertility should be balanced, driven by an active population of microorganisms. Any additional fertilizer requirements should be released slowly since too much or too little will affect the health and most certainly the flavor of a crop. As with any living organism, soils express their own character, it's where water, earth, air and the fire of the sun all interact and express themselves in an endless variety of organic life. I like the idea that places have a taste and that we as farmers can steward this land and share it's flavors with all of you. Enjoy the variety of Earthly Gifts in your last CSA box of the Year. From the entire Live Earth Farm Family, we wish you peaceful and joyful Holidays.

|
|
What's Up in the Fields
~~~~~~~~~~~~~~~~~~~~~~~~~~~~~~~~~~~~~~~~~~~~~~~~
One last note on carrots before you bite into them. Carrots symbolize patience. After they are sown in the ground they are one of the slowest germinating seeds. If weeds end up competing with the tender emerging shoots, one has to patiently eliminate the competition and then wait patiently for the plant to mature. The carrots in your share where sown in September, more than 90 days ago, their slow growth, combined with the ideal moisture and temperature these carrots are now of the utmost sweetness and crispness.
Debbie asked me to give a quick update on "new and exciting" veggies to expect in the winter shares next year. We should have more of what we've had, as well as onions, more preserves (jams and tomatoes), rutabagas, golden beets, leeks, broccoli, cauliflower, and more winter squash. It's winter, so don't expect anything to sunny anytime soon. Bon appetite :)
|
Pictures from around the Farm~~~~~~~~~~~~~~~~~~~~~~~~~~~~~~~~~~~~~~~~~~~~~~~~  Yeah, it was cold this morning, sooooooo cold, we all wanted to curl up and ...never leave our warm cozy bed again. Snow on the mountains behind the farm...and winter hasn't started yet. I am glad we got the rain cold and all, better than no rain.   Rolling fields with emerging covercrop. Dozens of quail hiding in the shrubs to the right. Trust me!
|
|
Greetings from our new farm intern
~~~~~~~~~~~~~~~~~~~~~~~~~~~~~~~~~~~~~~~~~~~~~~~~  Hello Live Earth Farm Community. I just wanted to take this opportunity and introduce myself to you all as the new education intern living and working on the farm. Born and raised in the Green Mountains of Vermont, I recently graduated from Hamilton College with a degree in environmental studies and psychology. Shortly after graduation, I found myself on a two-month long, soul searching, 8,000 mile cross-country adventure, with four other close companions from the East Coast. We finally landed in the coastal mountains of San Mateo County just south of San Francisco living and working on a small organic farm and delivering produce to two restaurants in the bay area. I had some experience with farming before getting to California, but it was minimal to say the least. What I did know was how much I yearned to give as much time and energy as possible to the most practical and realistic ways of improving our environment, living a sustainable lifestyle and sharing that knowledge with others. Hello Live Earth Farm Community. I just wanted to take this opportunity and introduce myself to you all as the new education intern living and working on the farm. Born and raised in the Green Mountains of Vermont, I recently graduated from Hamilton College with a degree in environmental studies and psychology. Shortly after graduation, I found myself on a two-month long, soul searching, 8,000 mile cross-country adventure, with four other close companions from the East Coast. We finally landed in the coastal mountains of San Mateo County just south of San Francisco living and working on a small organic farm and delivering produce to two restaurants in the bay area. I had some experience with farming before getting to California, but it was minimal to say the least. What I did know was how much I yearned to give as much time and energy as possible to the most practical and realistic ways of improving our environment, living a sustainable lifestyle and sharing that knowledge with others.
Needless to say, the three months I spent this fall on the farm in San Mateo only further fueled my desire to pursue more with sustainable agriculture and small scale organic food systems. I came across an internship program posted by Jessica [here at LEF] advertising an opening in the education department and jumped on the opportunity. In the past I have spent time working in the Vermont public school system as a substitute teacher, and previously held a position as an education intern at the ECHO Lake Aquarium and Science Center in Burlington, Vermont.
So here I am, happy to be at Live Earth Farm and looking forward to learning all that I can about farming and teaching others about the future of sustainable food systems. I am extremely excited to have joined the Live Earth Farm community and am looking forward to seeing you all around the farm in the upcoming months.
Feel free to stop in the barn to say hello!
Taylor Brady
|
|
Can you help the farm?
~~~~~~~~~~~~~~~~~~~~~~~~~~~~~~~~~~~~~~~~~~~~~~~~
Hello Live Earth Farm Community, I am reaching out to our CSA members to see if there are any experienced sign-builders in the bunch. Live Earth Farm is looking to construct a large greeting sign/information kiosk that will be placed near the barn containing important information about the farm. Live Earth is wondering if anyone has either experience building an information kiosk, or knows of someone who does, as it would be greatly appreciated. Please e-mail any thoughts or information to Taylor at lefeducation@baymoon.com. Thanks! |
|
Remember...
~~~~~~~~~~~~~~~~~~~~~~~~~~~~~~~~~~~~~~~~~~~~~~~~ <> ALL winter CSA deliveries are on WEDNESDAYS, so if you're used to picking up on Thursdays, you have to make the mental switch!
<> Pick-up schedule is NOT every week. Here's a repeat of the dates all winter share members got in an email (these dates are also on our website):
12/3/08 (already passed)
12/10/08 (already passed)
12/17/08
<3 week break over holidays>
1/14/09
<no share 1/21>
1/28/09
<no share 2/4>
2/11/09
<no share 2/18>
2/25/09
<no share 3/4>
3/11/09 = last winter share!
<2 week break>
Weds/Thurs April 1st/2nd = 1st delivery week of the regular season!
|
Notes from Debbie's Kitchen
~~~~~~~~~~~~~~~~~~~~~~~~~~~~~~~~~~~~~~~~~~~~~~~~ Click here to go to recipe database.
Ah, there is a seemingly endless supply of recipes out there, which pleases me no end because that means there's always fodder for me to come up with new or different ways for you (and me!) to prepare the veggies we get in our boxes each week. I have to say... I love my job! It helps that I love to cook (and to eat!), especially when food is prepared from the heart and with good ingredients. You don't need much more than that really!
Happy holidays everyone!! May your time be well spent in the company of family and friends, pets and neighbors, (and good food, of course!); I'll 'see' you all again in three weeks - in the new year - yikes! ;-) - Debbie
Using Happy Girl Kitchen's canned farm tomatoes
This is a slightly modified version of what I ran in last winter's newsletter.
You are going to love these tomatoes!! What's different and unique about them is that, as opposed to regular canned tomatoes off the grocery store shelf, or even last week's preserved heirloom tomatoes... these are essentially pickled, in a light vinegar brine with garlic, basil and peppercorns (If you got a winter share last year, you'll remember them!). What's nice about this is that they can be used in salads... i.e. they don't have to be cooked! The vinegar acts a preservative so they are safe to eat right out of the jar (but of course refrigerate them after opening). Yes you can continue to eat them 'raw' out of the jar even after that; think "pickles". They'll keep in the fridge for a couple weeks after opening easy, but I doubt they'll be around that long because you'll gobble them up long before then.
So go ahead and put some lettuce leaves on individual plates, fish out the firmest tomatoes you can find (some of them are soft-ripe and although perfectly edible out of the jar, they lose points on presentation** because they just smush under the knife), sliced them (with a sharp knife, carefully) into wedges, scatter them over the lettuce, added some feta cheese and Kalamata olives, then drizzle with olive oil and some of the vinegar from the jar... and WOW! Taste o' Summer!!! What a treat!
**and if you're not picky about presentation, go ahead and use the smushier ones on the salad!
I dearly love dill, and so when I saw the following recipe I was happy to remember that I'd dried the fresh dill we got this past summer... and still have some left!
Alsatian Dilled Cabbage
from 'Recipes from a Kitchen Garden'
serves 6
"A hearty, filling dish for a cold fall [or winter!] evening. Excellent with pork, chicken, sausages or frankfurters," say Renee and Fran, co-authors of the book.
4 tbsp. butter
½ C chopped onions
1 small, firm head cabbage (about 2 ½ lbs), cut into ½-inch dice
½ tsp. salt
4 tsp. chopped fresh dill or 1 tbsp. dried
1 tbsp. all-purpose flour
1 C sour cream (don't substitute)
1 tbsp. mild vinegar
1 tsp. sugar
Melt the butter in a large, deep pan and sauté the chopped onions until softened and slightly golden in color. Add the diced cabbage, salt and dill, and stir to mix together. Cover the pan and cook over medium heat until the cabbage is just tender-crisp - don't overcook. Remove from heat briefly while you stir the flour into the sour cream. Put the cabbage back over medium heat, add the sour cream mixture and cook, stirring, until the cabbage is glazed and thickened, about 3 to 5 minutes. Add the vinegar and sugar. Stir to blend and serve immediately.
From that same cookbook, there was a recipe for 'Fresh Carrots with Apricots' which uses dried apricots and sugar... I say, why not use some of our apricot preserves instead?
Fresh Carrots with Apricots
modified from 'Recipes from a Kitchen Garden'
serves 4
2 tbsp. butter
2 tbsp. water
1 lb. fresh carrots, shredded
1 tbsp. good white wine vinegar
3 tbsp. Live Earth Farm apricot preserves [instead of 6 dried apricots sliced up and 1 tbsp. sugar, as called for in original recipe]
Heat butter and water in a large skillet over medium-high heat. Add carrots. Sauté 2 to 3 minutes. Stir in apricot preserves and vinegar; stir and cook rapidly for 1 minute until nicely glazed. Serve immediately.
This next recipe is also from the same cookbook! I like it's use of both chard and beets.
Chard (and/or beet greens) with Beet Vinegar
from 'Recipes from a Kitchen Garden'
serves 4
2 lg. beets, cooked and peeled [or equivalent in smaller farm beets]
1 C rice vinegar
3 tbsp. sugar
½ tsp. lemon juice
dash white pepper
1 lg. bunch fresh chard or beet greens [or mix of both!], chopped
butter to taste
Garnish: sour cream or plain yogurt
In a blender, purée the beets together with the rice vinegar, sugar, lemon juice and white pepper. Pour into a non-aluminum saucepan and bring to a boil. Reduce heat and simmer, covered, 5 minutes. Cool. Steam the chard until tender, drain. Toss chard with butter and pepper to taste. Arrange cooked chard on a serving platter. Spoon over some of the beet vinegar to taste and garnish with a very generous dollop of sour cream or yogurt.
Short Ribs with Beets
from 'Your Organic Kitchen' by Jesse Ziff Cool
[In a sidebar to this recipe, Jesse writes, "Once you begin cooking with meats that are not treated with artificial hormones or antibiotics, you will notice a difference in flavor. I find that organic meats have much more flavor than conventional ones." I second Jesse's opinion, although I extend it to include pasture-raised meats as well. If you're interested in a source for great beef, visit our friends Joe and Julie Morris' website and learn about their beef CSA at www.morrisgrassfed.com.]
3 lbs. beef short ribs
2 tbsp. garam masala
6 garlic cloves, chopped
8 shallots
2 carrots, finely chopped
2 celery ribs, finely chopped
1 C hearty red wine (such as zinfandel)
3-4 C vegetable or chicken broth
1 can (14 ½ oz) diced tomatoes
4 sprigs fresh thyme
4 sprigs fresh Italian parsley
2 bay leaves
2 tsp. ground coriander
1 tsp. ground cloves
1 tsp. salt
1 tsp. freshly ground black pepper
6 beets, trimmed and scrubbed
Preheat oven to 450 degrees.
Season the ribs with garam masala and a pinch of salt and pepper. Place in a large roasting pan and roast for 45 minutes, or until the meat is browned.
Reduce the heat to 375 degrees. Add the garlic, shallots, carrots, celery, wine, 3 C. of the broth, tomatoes (with juice), thyme, parsley, bay leaves, coriander, cloves, salt and pepper. Roast, uncovered, for 1 ½ hours, or until the meat is tender but not yet falling off the bone.
Cut the beets into large wedges and add to the ribs. Spoon the sauce over the beets and ribs. Add the remaining 1 C broth if the sauce is too thick. Roast for 1 hour, or until the beets and meat are tender.
Using tongs or a slotted spoon, remove the ribs and beets to a serving platter.
Remove and discard the bay leaves and any sprigs in the sauce. Working in batches if necessary, place the sauce in a food processor or blender. Puree until smooth.
Pour the sauce over the ribs and beets.
[Jesse doesn't say, but I'd serve this over either wide egg noodles or rice or cooked grain of some sort (quinoa, couscous, barley?). Doesn't matter, just so long as you have something to soak up the yummy sauce!]
Since I'm not sure how much longer we'll be getting apples (AND because if you're like me, you still have plenty!), here is a sensational recipe, also from Jesse Cool's cookbook:
Apple-Asiago Pie
Jesse says, "This recipe was developed by Christine Guiterez, a former pastry chef at Flea St. Cafe [a restaurant of Jesse's in Menlo Park]. A twist on the classic Cheddar cheese and apple pie, this combination of apples with salty cheese and pepper may sound a bit unusual, but to me, it's even better than the traditional."
Crust
1 ½ C whole grain pastry flour
1 ½ tsp. dried thyme
¼ tsp. salt
½ C very cold unsalted butter
½ C milk
Topping
1 C whole grain pastry flour
1 C packed brown sugar
1 C (2 oz) grated Asiago cheese
½ tsp. freshly ground black pepper
6 tbsp. very cold unsalted butter
Filling
6 large crisp apples, peeled, cored, and thinly sliced
¾ C packed brown sugar
1 tbsp. cornstarch
¼ tsp. freshly grated nutmeg [or ground, if you don't have fresh]
To make the crust: In a large bowl, combine the flour, thyme and salt. Grate the butter into the mixture. Using your hands or a pastry blender, work the butter into the flour mixture until the pieces are about the size of peas. Add the milk, ¼ C at a time, and blend until a soft, moist dough is formed. Add a few more tablespoons milk if the dough seems dry. It should be somewhat sticky.
Form the dough into a ball then flatten into a round. disk. Wrap in plastic wrap and refrigerate for at least 1 hour.
To make the topping: In a medium bowl, combine the flour, brown sugar, cheese and pepper. Grate the butter into the mixture. Using your hands or a pastry blender, work the butter into the flour mixture until the pieces are about the size of peas. Refrigerate until ready to use.
Preheat the oven to 350 degrees. When the crust dough is chilled, place it on a well-floured surface and roll to about a 1/8" thickness, turning and flouring the dough often to keep it well-floured. Fold the dough in half and place in a 9" or 10" pie plate. [Unfold the dough on pie plate], turn under and crimp the crust.
To make the filling: In a large bowl, combine the apples, brown sugar, cornstarch, and nutmeg. Place in the prepared crust. Crumble the crumb topping over the apples.
Bake for 1 hour, or until the crust is browned and the apples are soft. Place on a rack to cool for at least 30 minutes before slicing.
Lastly, this is one of my favorite cookie recipes! Since Christmas is coming and because we're getting jams in our shares, I thought this would be a perfect 'ender' for the winter newsletter before we go on break. Anyway, I have this recipe lovingly hand-written out on an old 3x5 card - when I was a kid, my mom got me my own copy of Joy of Cooking, and I proceeded to copy the recipes I liked onto 3x5 cards... even though I had (and still have) the cookbook! It was a fun thing to do at the time, create my own recipe file, and yep, I still have and use the card! As a matter of fact, I used it just earlier this week; I imported some of the neighborhood kids to help me (see picture below).
Thumbprint Cookies
from Joy of Cooking
makes about 2 dozen 1 ½-inch cookies
(can easily be doubled or tripled)
Preheat oven to 375 degrees
mix together thoroughly:
½ C soft shortening
¼ C brown sugar
1 egg yolk (save white)
½ tsp. vanilla
sift together and stir in:
1 C flour
¼ tsp. salt
Roll dough into 1" balls, dip in slightly beaten egg white and roll in finely chopped nuts (3/4 C). Place about 1" apart on ungreased cookie sheet and bake 5 minutes. Remove from oven. Quickly press thumb on top of each cookie [to create the divot for the jams!] Return to oven and bake 8 minutes longer. Cool. Once cooled, add a dab of jam in each 'thumbprint'.
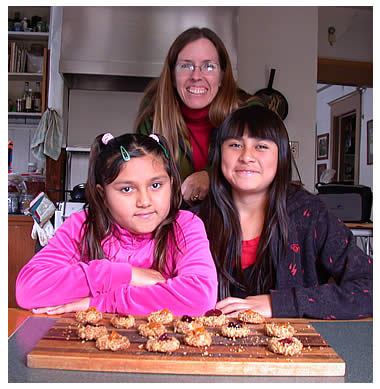
That's me behind Angel (left) and Jenny (right) posing behind some of our creations!
|
|
