Greetings from Farmer Tom
~~~~~~~~~~~~~~~~~~~~~~~~~~~~~~~~~~~~~~~~~~
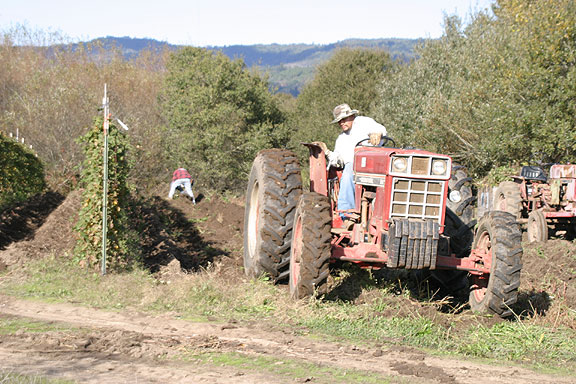
 Blessed with sunny weather we are able to finish the
fall season with
all our chores of cleaning up the farm, mulching the
strawberries,
and squeezing in some early plantings of raspberries
and late
plantings of yellow and red onions. Everyone has been working very hard (well,
except for maybe Chewy, our farm dog, pictured at right!) Many of our workers
are ready for a break, preparing for their long journey home to
Guanajuato to spend
holidays with family and friends. I know it's time
to slow down and
reflect when the first 2007 seed catalogs start
arriving in the mail;
it's like an early Christmas present! Seed catalogs
are right there
on the top of my list when it comes to favorite
winter reading
material. I take them with me wherever I go, and
pull them out
during a quiet moment to indulge myself. I'll let my
imagination run
wild as I browse through pages of pictures and
discriptions of
hundreds of varieties of crops, flowers, fruits and
herbs. The farm
fields turn into an imaginary canvas as I compose
next season's crop
picture, and best of all I can for a brief moment
enjoy the beauty of
flavors, colors, and smells from a cozy comfortable
place, letting my
mind do the farming without worry or stress. I feel
connected with
the many farmers and gardeners who live a similar
seasonal cycle, and
I am excited about increasing the diversity of
vegetable varieties we
grow. Amy, this year's intern, has inspired me to
explore the
possibility of saving our own seed; it seems that
seeds saved from
plants grown in one place, and which continue to be
planted in the
same place, do better both in growth, nutrient
uptake and resistance
to pests and diseases.
Blessed with sunny weather we are able to finish the
fall season with
all our chores of cleaning up the farm, mulching the
strawberries,
and squeezing in some early plantings of raspberries
and late
plantings of yellow and red onions. Everyone has been working very hard (well,
except for maybe Chewy, our farm dog, pictured at right!) Many of our workers
are ready for a break, preparing for their long journey home to
Guanajuato to spend
holidays with family and friends. I know it's time
to slow down and
reflect when the first 2007 seed catalogs start
arriving in the mail;
it's like an early Christmas present! Seed catalogs
are right there
on the top of my list when it comes to favorite
winter reading
material. I take them with me wherever I go, and
pull them out
during a quiet moment to indulge myself. I'll let my
imagination run
wild as I browse through pages of pictures and
discriptions of
hundreds of varieties of crops, flowers, fruits and
herbs. The farm
fields turn into an imaginary canvas as I compose
next season's crop
picture, and best of all I can for a brief moment
enjoy the beauty of
flavors, colors, and smells from a cozy comfortable
place, letting my
mind do the farming without worry or stress. I feel
connected with
the many farmers and gardeners who live a similar
seasonal cycle, and
I am excited about increasing the diversity of
vegetable varieties we
grow. Amy, this year's intern, has inspired me to
explore the
possibility of saving our own seed; it seems that
seeds saved from
plants grown in one place, and which continue to be
planted in the
same place, do better both in growth, nutrient
uptake and resistance
to pests and diseases.
The colors on the farm right now are astounding, as
the foliage is
finally turning and I am conscious of paying more
attention to nature's
rhythms. We all long to slow down and discover how
to best harmonize
with nature's rhythms, yet instead, often, we spend
too much time
worrying how to be the most efficient with our time,
which in the end is
only short term. It's time to set aside a small
space in our busy
lives and forget what is most efficient. I will take
the seed I
always carry in my pocket and ponder for a moment
the spiritual and
biological wealth I hold in my hand. Try it and
enjoy the journey!
|
Notes from Debbie's Kitchen
~~~~~~~~~~~~~~~~~~~~~~~~~~~~~~~~~~~~~~~~~~
(remember,
you can always go to my recipe
database for LOTS of ideas. All recipes
are listed in order by 'key ingredient')
Yay,
I made a little headway since last week and figured out how to include
recipes here now! FYI I was also able to put last week's newsletter
on our website, so if you want to go back to it for any reason, it
is now available through the "Newsletters"
link on our website. Okay, now for some recipes! And by the way, wherever
you see anything in italics or [italics within square brackets], that's
me putting my two cents in! - Debbie
Gorgonzola crostini with Kale
modified from a 2005 SJ Merc clipping (credited originally to the cookbook "Small
Bites" by Jennifer Joyce)
makes 16 crostini
16 thin slices of sourdough bread
olive oil
salt and pepper
2 cloves garlic, peeled
1 bunch kale, washed, leaves stripped from stems
1/2 tsp. crushed dried red chilies
1 tbsp. raisins, soaked in warm water for 10 minutes
2 tbsp. pine nuts, toasted
3 tbsp. balsamic vinegar
4 oz. Gorgonzola cheese
Parmesan shavings, to garnish [optional]
Place bread slices on a baking sheet, brush lightly with olive oil and sprinkle
with salt and pepper. Bake 6 minutes, until browned on edges but still chewy
in the center. Rub bread slices with one of the cloves of garlic [I'd
cut the clove in half to expose the juice] and set aside.
Bring a pot of well salted water to a boil, reduce heat, add kale and simmer
3 to 5 minutes. Drain and immediately plunge into ice water to preserve color
and stop the cooking. [If just making it for myself
or family, I'd skip this step, but if you want it to be 'prettier' it will
be a brighter green this way.] Drain again and squeeze out as much water as possible with your hands.
Chop and set aside.
Finely slice garlic cloves. Heat 3 tbsp. olive oil in a large frying pan over
medium heat. Add garlic and crushed chilies, and brown lightly. Add cooked
kale and toss to combine flavors. Stir in raisins, pine nuts, and vinegar.
Toss again to heat through.
Spread Gorgonzola thickly over crostini. Spoon on kale mixture, garnish with
optional Parmesan shavings and serve.
Note: Crostini can be made 2 days in advance and stored in an airtight container.
If refrigerated, the greens can be cooked earlier on the same day you serve
them, but don't toss them with the remaining ingredients until 1 hour before
serving, to retain the green color.
How to Roast Cauliflower
from Cook's Illustrated magazine, article by Charles Kelsey
My husband Ken and I were at friends the other night for dinner, and our host
prepared this marvelous roasted cauliflower! He showed me this article from
Cook's Illustrated, and I love this guy's take on cauliflower. I agree, my
favorite way to prepare it is to roast it. - Debbie
"I don't understand why most cooks boil cauliflower. When things go wrong
(and they often do), the cauliflower is smelly (from overcooking) and mushy.
Even when you avoid overcooking, boiled cauliflower is bland. No wonder delicately
flavored cauliflower often gets drowned under a heavy blanket of cheese sauce.
"When I want to add flavor to vegetables I often turn to my oven. Roasting
is a great technique for coaxing big flavor from vegetables; the dry heat caramelizes
the natural sugars in everything from potatoes to onions. I had never roasted
cauliflower, but it seemed worth a try.
"I found three basic techniques in my research: roasting the cauliflower straight
up, blanching it in water then roasting it, and steaming it then roasting it.
Each method separated a cauliflower head into florets before roasting on a
baking sheet in a very hot oven (around 475 degrees). Each simple preparation
coated the cauliflower florets with oil, salt, and pepper at some point in
the procedure.
"When all three versions were sampled side by side, the blanch-roasting technique
was the loser of the bunch. The florets were soggy and had little color (read:
flavor). The straight-up roasted cauliflower was well liked for its caramelized
exterior, however it cooked unevenly and had some dried-out, gritty florets.
Finally, the steam-roasted cauliflower emerged with creamy, evenly cooked florets
but so-so browning and flavor.
"My goal was to combine the last two methods and produce nicely caramelized
cauliflower with a creamy texture. While testing the straight-up roasting technique,
I noticed that the cauliflower was shedding its moisture in the first minutes
of roasting. I was pretty sure that covering the baking sheeet would trap this
moisture and add just enough steam to cook the cauliflower properly.
"After some tinkering, I discovered that 10 minutes was the perfedt amount
of time to leave the foil on. The steam kept the florets moist enough to withstand
the next 20 minutes of roasting and prevented them from turning dry and gritty.
"Served with a drizzle of extra-virgin olive oil or a quickly prepared sauce,
roasted cauliflower is a revelation – sweet, creamy, and packed with flavor. "
[and now, the recipe!]
Roasted Cauliflower
serves 4 to 6
"This dish stands well on its own, drizzled with extra-virgin olive oil
... some tasters liked spiced versions made with either curry powder
or chili powder. Simply stir 2 tsps. of either spice into the oil before
seasoning the cauliflower in step 1." [My friend just sprinkled curry
powder over the oiled, ready-to-roast cauliflower and that worked just
fine.]
1 medium head cauliflower
1/4 C extra-virgin olive oil, plus extra for drizzling
Kosher salt and black pepper
1. Adjust oven rack to lowest position and heat oven to 475 degrees.
Trim outer leaves of cauliflower and cut stem flush with bottom. Cut
head into 8 equal wedges so that the core and florets remain intact. [This
was the particularly novel and useful pointer of this recipe, as opposed
to cutting the head up into florets!] Place wedges cut side down
on foil- or parchment-lined rimmed baking sheet. Drizzle with 2 tbsp.
oil [rub to coat evenly] and sprinkle with salt and pepper [and
curry powder or chili powder]. Gently flip wedges and oil/season other sides.
2. Cover baking sheet tightly with foil and cook for 10 minutes. Remove
foil and continue to roast until bottoms of cauliflower pieces are golden,
8 to 12 minutes. Remove sheet from oven, and, using spatula, carefully
flip wedges. Return sheet to oven and continue to roast until cauliflower
is golden all over, 8 to 12 minutes longer. Drizzle with sauce of your
choice [see recipe below for one, and remember
to leave off the curry/chili powder if you plan on topping with a sauce!] and serve immediately.
I liked the following sauce, which accompanied
the roasted cauliflower recipe. I know we don't have the ingredients
for it this week, but next time we have cilantro and cauliflower in the
same box, you'll remember to come back here and look for this! - Debbie
Curry-Yogurt Sauce with Cilantro
makes enough for 1 recipe roasted cauliflower
1 tbsp. vegetable oil
1 large shallot, minced (about 4 tbsp.)
2 tsp. curry powder
1/4 tsp. red pepper flakes
1/3 C water
1/4 C plain yogurt
1 tsp. juice from a fresh lime
2 tbsp. minced fresh cilantro
salt and pepper
Heat oil in a small skillet over medium-high heat until shimmering. Add
shallot and cook until softened, about 2 minutes. Stir in curry powder
and pepper flakes; cook until fragrant, about 1 minute. Remove from heat
and whisk in water, yogurt, lime juice, cilantro and salt and pepper to
taste. Drizzle sauce over roasted cauliflower.
|